
Mixing it Up:
A look at advanced techniques for blending Word-Processing and Page-Layout-mode
document templates into a single, hybrid document style.
Mixed-Mode Documents in Pages 5.x/6.x
Updated 11/16/2017
Overview
One of the more disorienting behaviors that crops up when creating documents in the latest generations of Pages is that you can't Copy & Paste actual page objects from document to document. If you've been using the older Pages '08/'09 architecture for some time, it's something of a jarring shift in the paradigm - while you weren't able to Copy & Paste pages between Word Processing and Page-Layout mode documents before, you could at the very least copy layouts from one Page Layout document to another with relative ease.
Not so with Pages 5.x/6.x - you can copy the contents of the page within the app, but not a page in and of itself. While there are likely good reasons for inhibiting this sort of behavior from an architectural perspective, it can make for a confusing experience when you'd like to mix documents or otherwise use elements from one template in another.
If you're pressed for time, you can avoid some of the complexities we're detailing below by exporting individual documents to PDF and using Preview.app to blend multiple PDFs into one master document - and if your mixed document is a one-time thing, this can be a far easier approach than delving into the sometimes-unpredictable world of blending Page Layout documents into Word Processing documents (or vice-versa).
But if you're looking to create a wholly-custom document style and manage the document end-to-end within Pages itself, you'll want to get a handle on some more-advanced techniques for integrating layouts from one template type to another and how to make the process as pain-free as possible.
In Part 1, we'll dive into The Basics with a look at Page-Layout to Page-Layout migrations and a few universal concepts. In Part 2, we dive further into advanced operations and how we can blend Page-Layout elements into a Word Processing-mode document and how to save a Custom Template to capture your work.
Part 1 - The Basics
This process is easiest when you're dealing with like-to-like migrations in Page Layout documents - that is, taking the elements of a Page Layout page and migrating them to another Page Layout document, such as substituting a Poster layout in for the cover for your Newsletter. Without the running Page Body connection, you're simply dealing with a page as something like a canvas, and can copy the key elements of the layout back and forth between documents with relative ease.
This can produce really unpredictable results if you're also mixing document orientations - copying elements between a Horizontal and Vertical brochure, for instance. Dissecting the basic Copy & Paste behavior in Pages 5.x/6.x when it comes to mixed orientations would be a tutorial in and of-itself - it's something of a mine-field of unintentional scaling, inconsistent placement and a lot of trial-and-error.
So for our purposes here, we're going to assume the documents you're merging are of the same theme/template family and of the same orientation. We're using Palo Alto for Pages for these examples, but the same principles apply to our other NXT-Gen Template Systems for Pages 5.x/6.x.
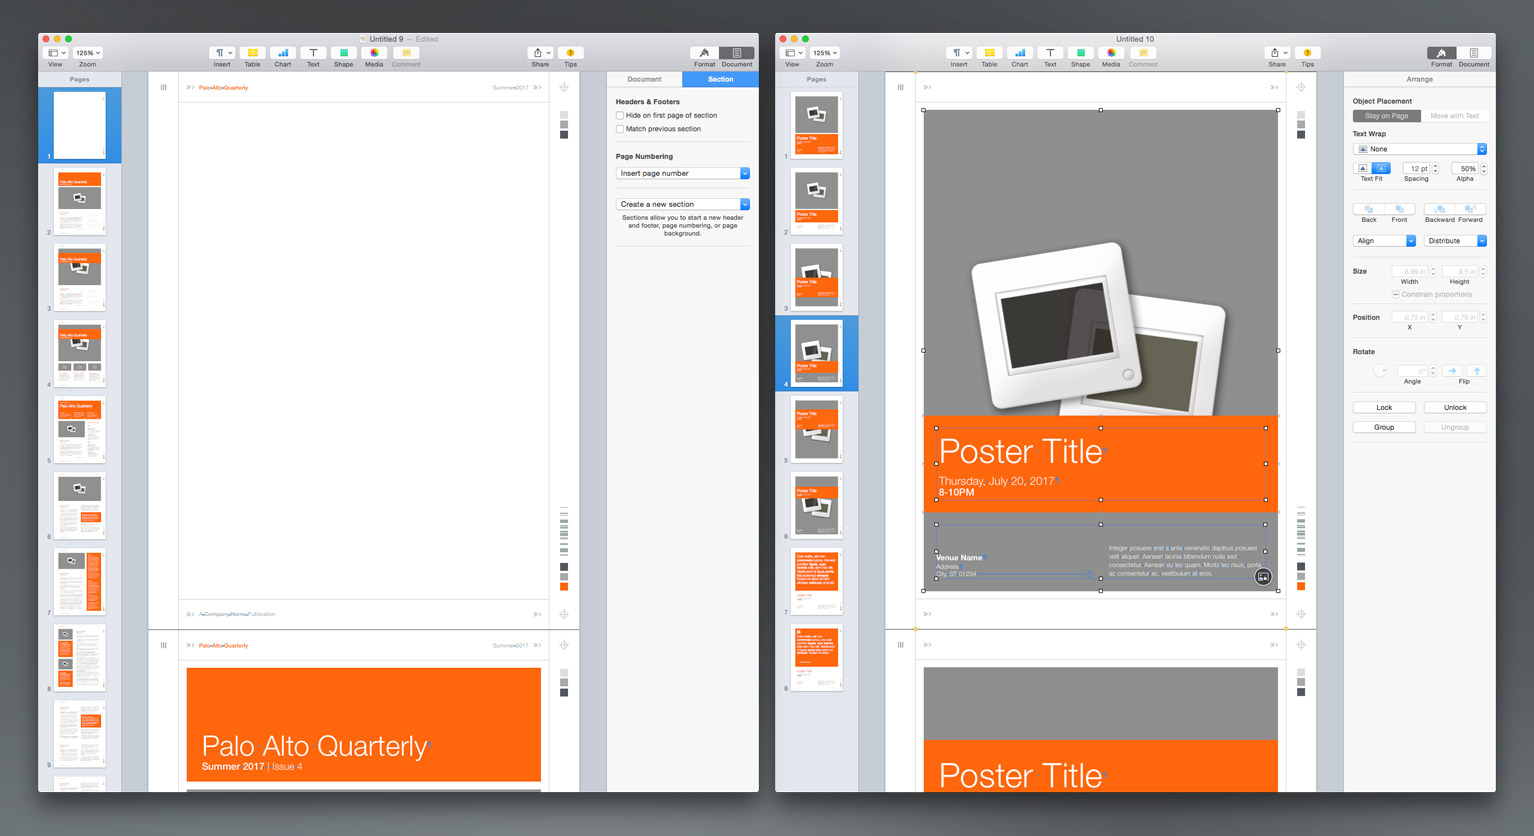
Sticking with the example we've already noted, let's look at how we'd include a Poster layout as our Newsletter cover. To get started, we're creating a new blank Newsletter, along with a new blank Poster file that we'll draw materials from. We're selecting Show Page Thumbnails and Show Invisibles from the View Menu to make it easier to orient ourselves before we go any further:
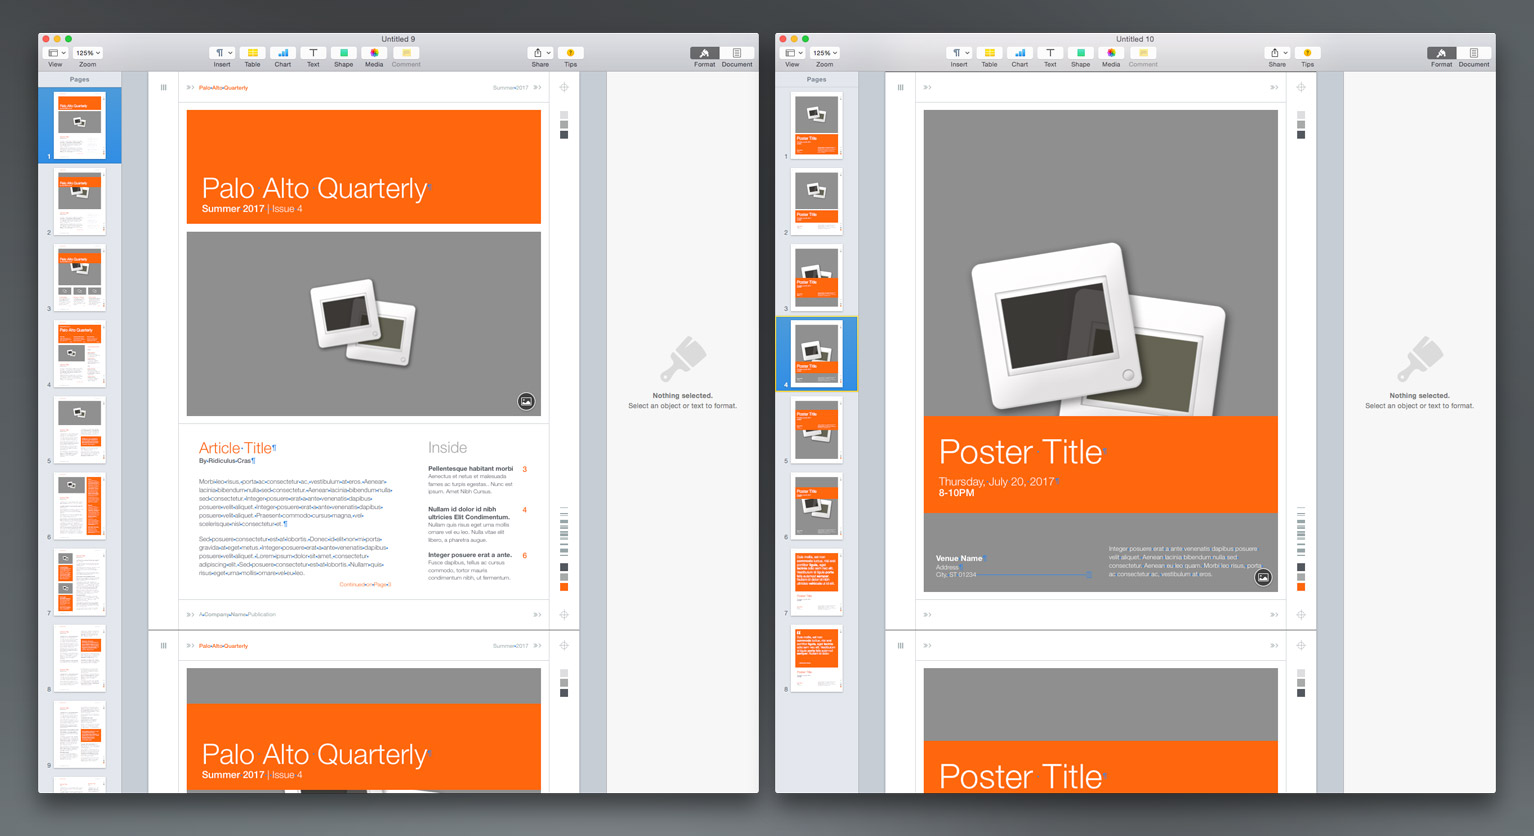
Now since we're in a Layout-mode document, we could start by simply deleting objects to make space on our Newsletter cover - but I like to keep my options open, so we're instead going to insert a new section in the Newsletter document, creating a Blank page we can use as a destination for our Poster Layout contents.
Select the first page in the Newsletter, open the Document settings and click on the Section tab to expose the section settings. Click on Create New Section toward the bottom of the Section options, and select After This Section - this will effectively create a new Blank page, including just the Section Master objects that carry from page to page.
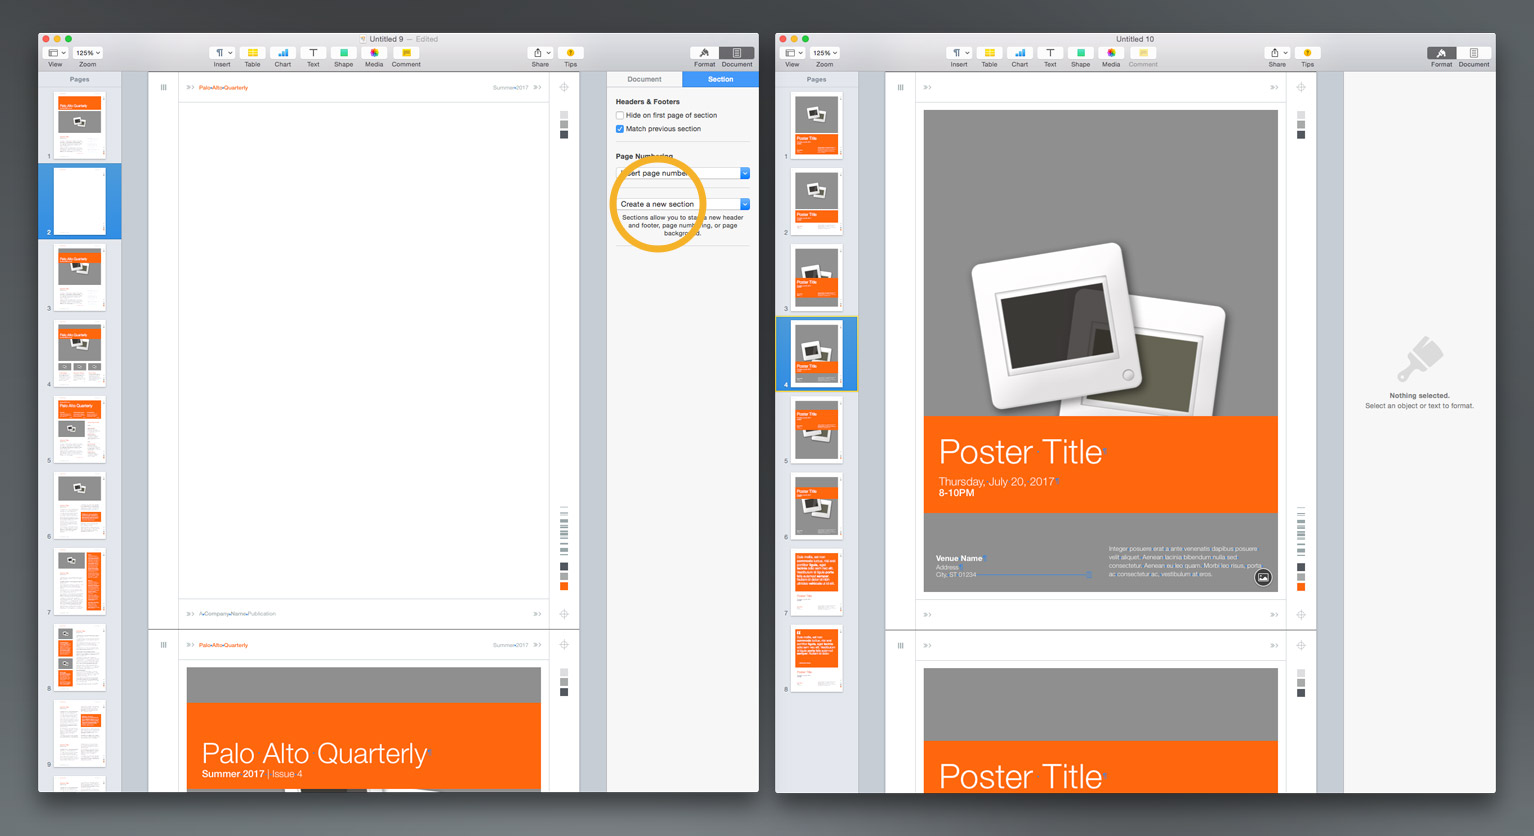
As the idea here is to create a magazine-style cover on our Newsletter, we're going to drag this new Blank page up to become the new page 1: we can remove the additional Cover styles now, or save that step until later - that's more a matter of preference and your own editing style.
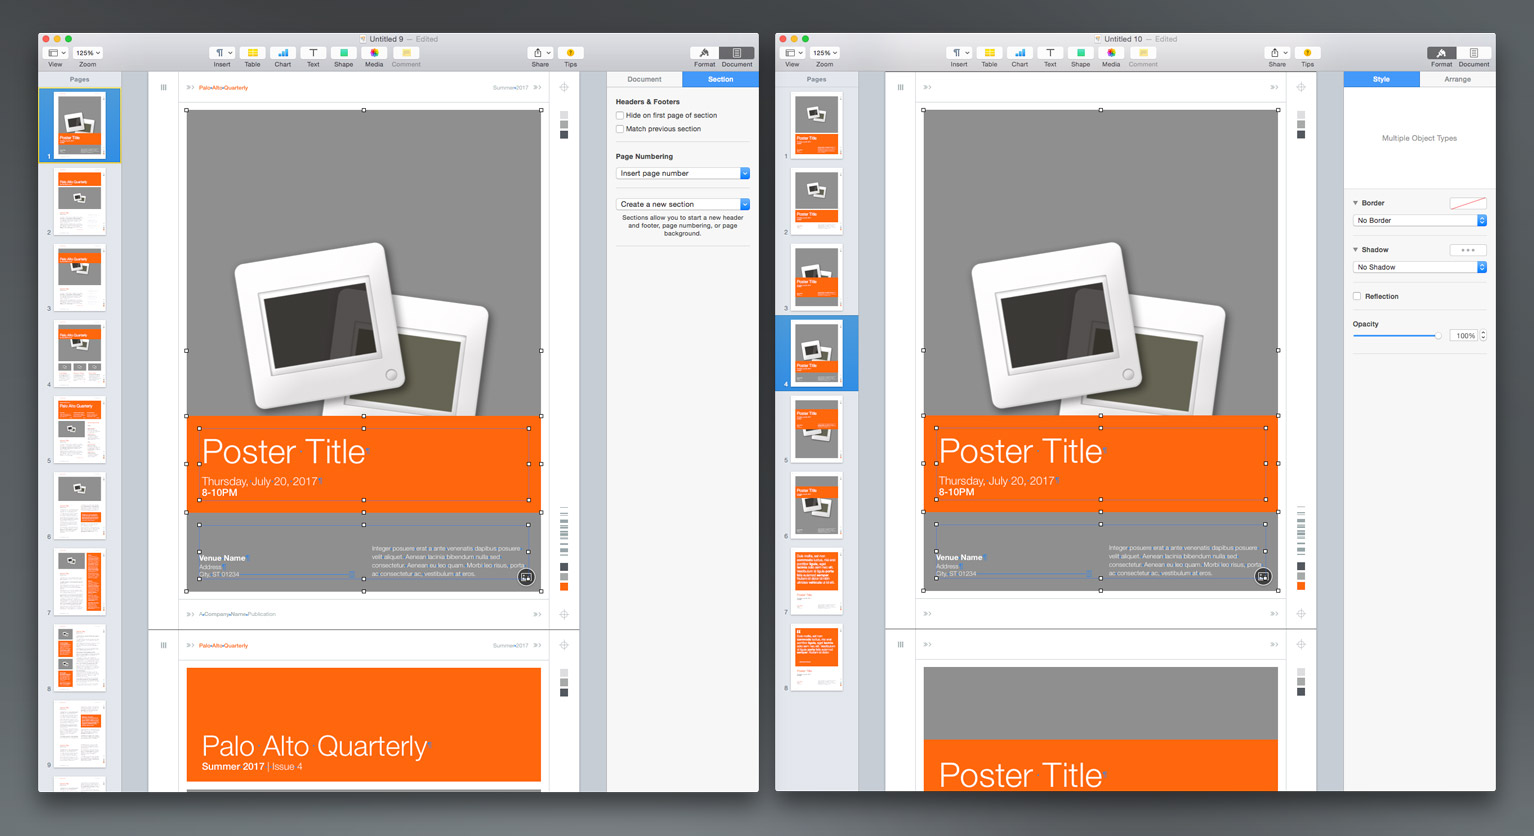
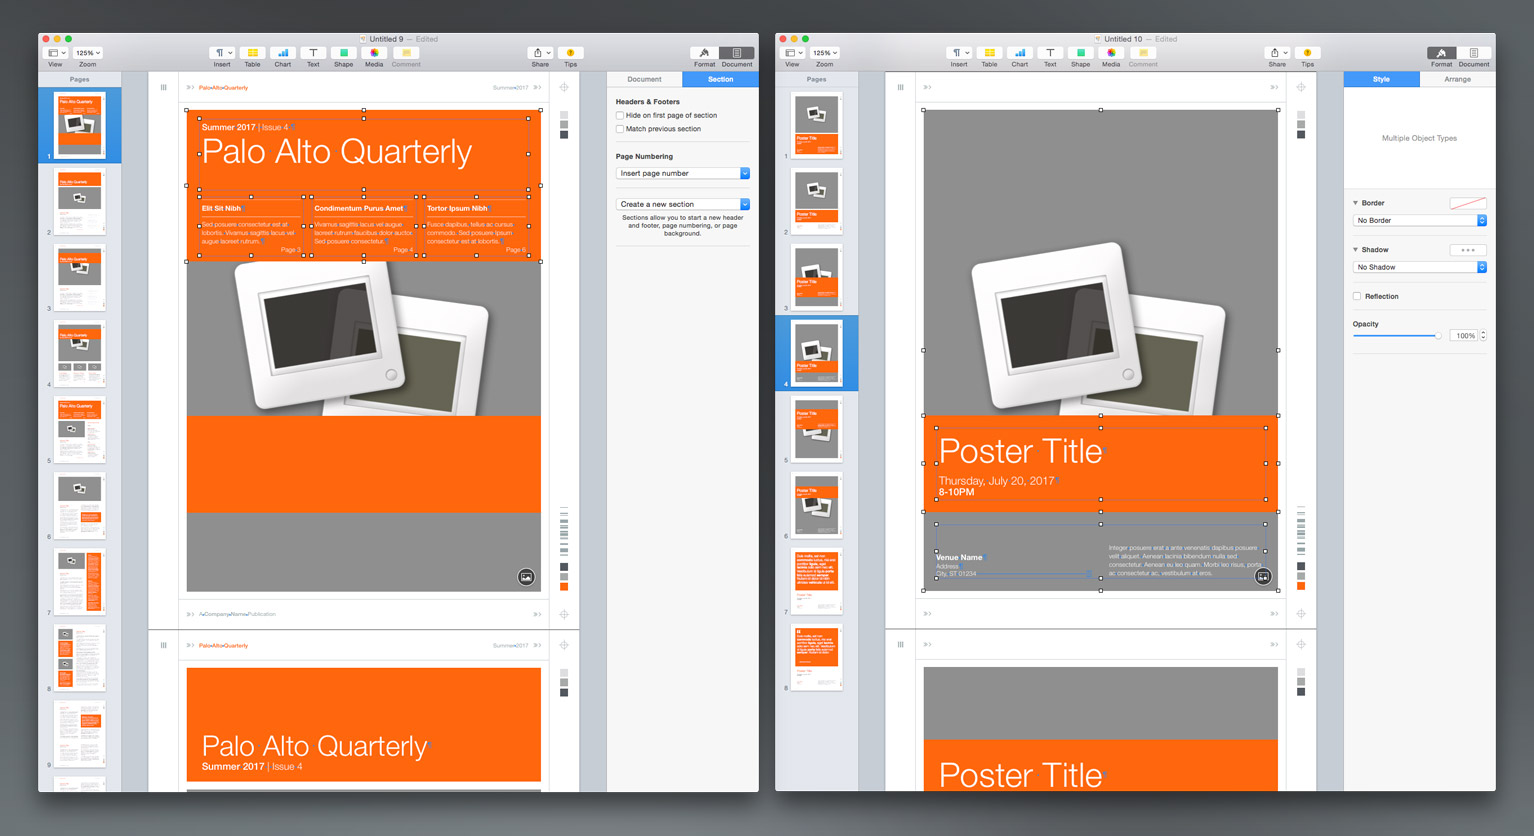
We've already identified Poster style 4 as the layout we'd like to use as our cover this quarter. With Page 4 selected in the Poster document, we can examine the two pages and look for what we will and won't need to worry about during this migration. Since our Blank page includes the running Section Master objects that are also present on the Poster - namely the framework lines and accent objects - we really only need to focus on the "page level" objects in this migration.
We can select these object individually, or drag-select across the page the select the multiple objects at once. We're going to drag-select here, as it's a good place to look at a usability quirk you're sure to encounter when you're working with Pages templates in this fashion. If you look at the objects selected when you drag-select the middle of the page, you'll notice a number of locked objects, as well as object with Yellow handles:
The Yellow-handled objects are Section Master objects - in this case we drug across the left & right accent lines that frame the page body. Oddly, though you can select these objects by drag-selecting like this, you can't then shift-select to exclude them from your selection without first enabling Master-Object selection. Intuitive, right?
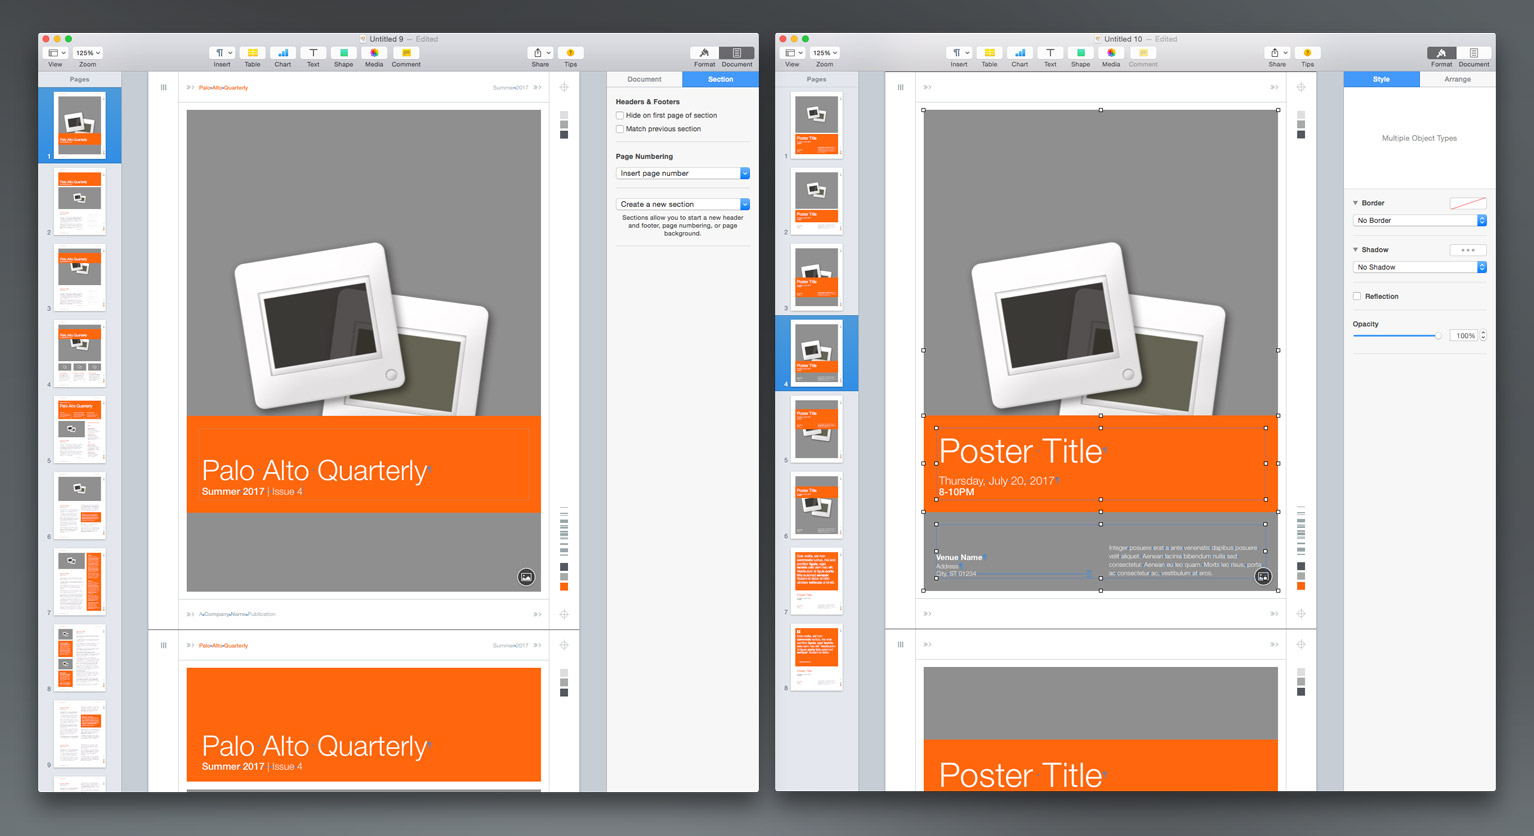
So if you encounter this, go up to the Arrange Menu, select Section Masters, and then Make Master Object Selectable. Once Master Object selection is enabled/on, you'll be able to command-click on each of those two lines to exclude them from your selection.
Which leaves Locked objects. With your selections still visible on the page, type Option-Command-L to toggle the lock status of the selected objects all at once. Now you're ready to Command-C your selection to Copy it to the clipboard.
Switch back to the Newsletter document, select the blank Page 1, and Command-V to paste the poster objects to the page:
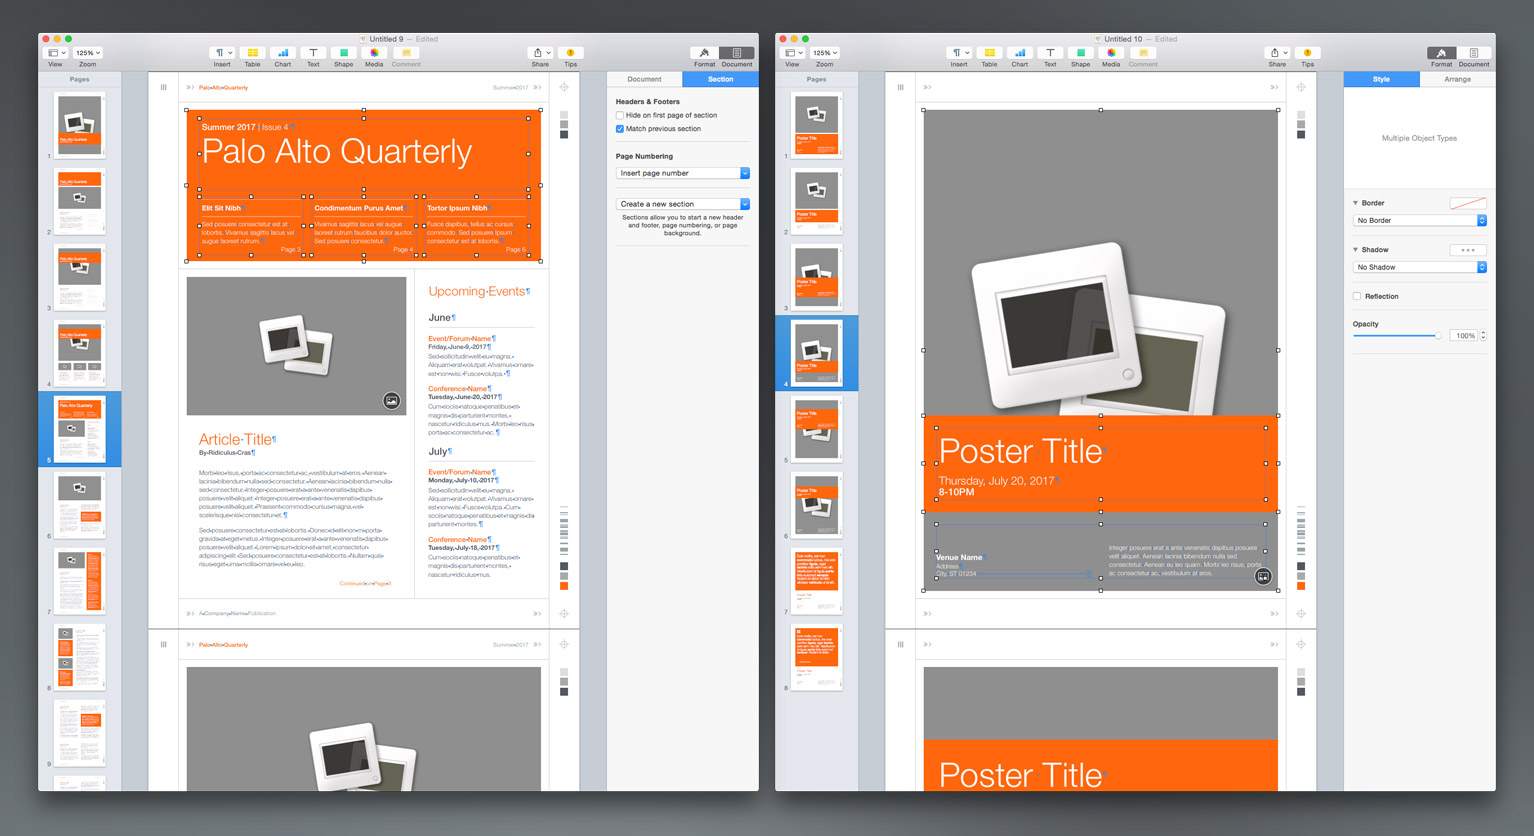
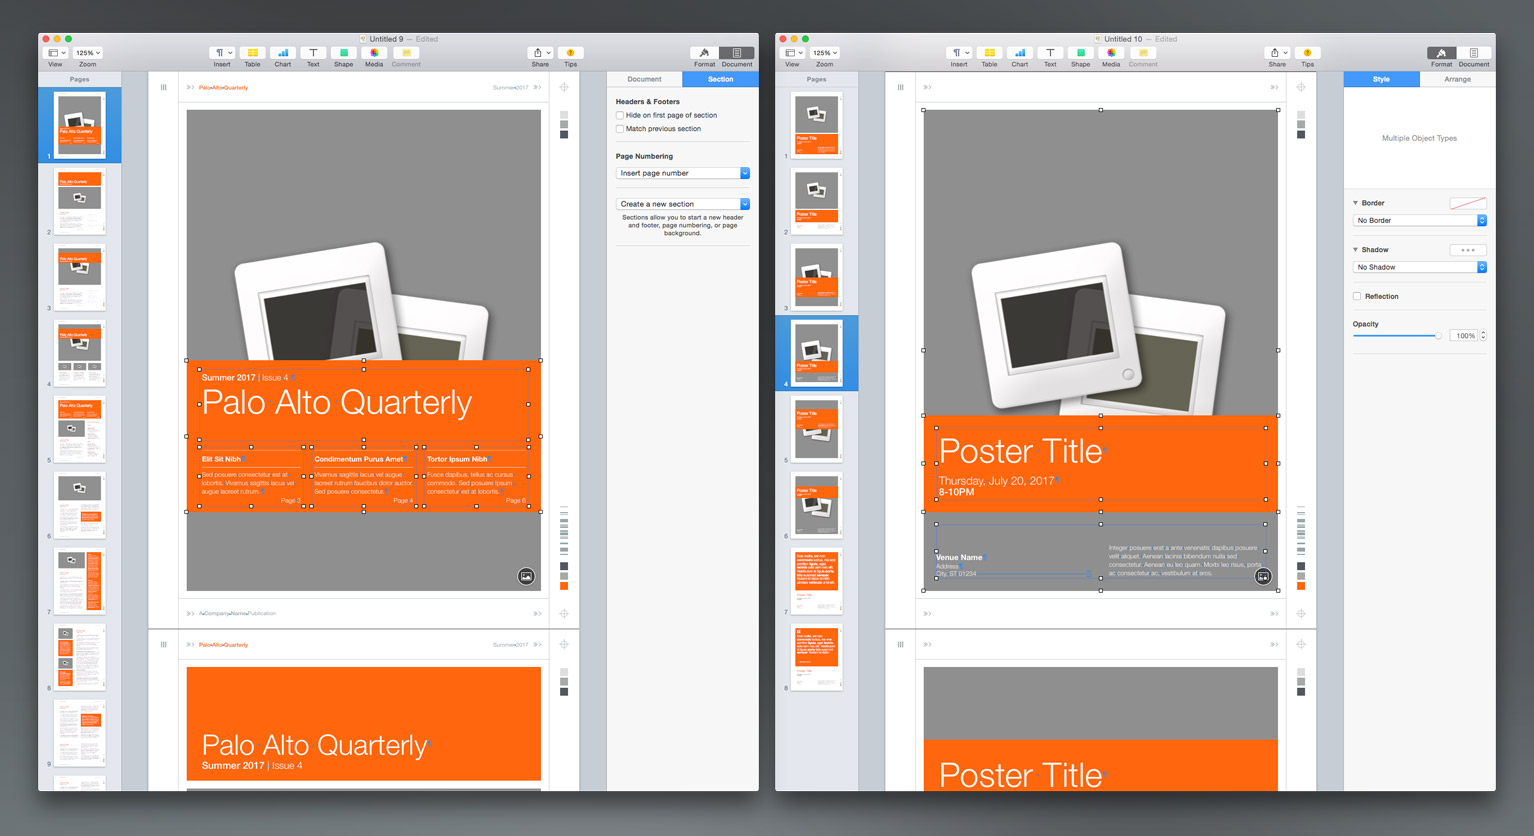
Which achieves our basic objective here: you've migrated the poster layout into the Newsletter. We'll want to walk through a few more changes, of course - we won't need the Venue information, for example, so we can select that object and simply delete it. And at the very least, we'll want the Newsletter-style Title/Issue text instead of the Poster-Style title/date combo.
Scroll to page 2, and double-click inside the text object containing the Title - Command-A to Select All inside that object, and Command-C to copy the Title/Issue information to the clipboard. Double-click into the text object on Page 1 containing the Poster Title elements, Command-A to Select All, and Command-V to replace those elements with the Title/Issue combo from the clipboard - since you're copying multiple placeholders at once, your placeholders should come through completely intact and ready-for-edit:
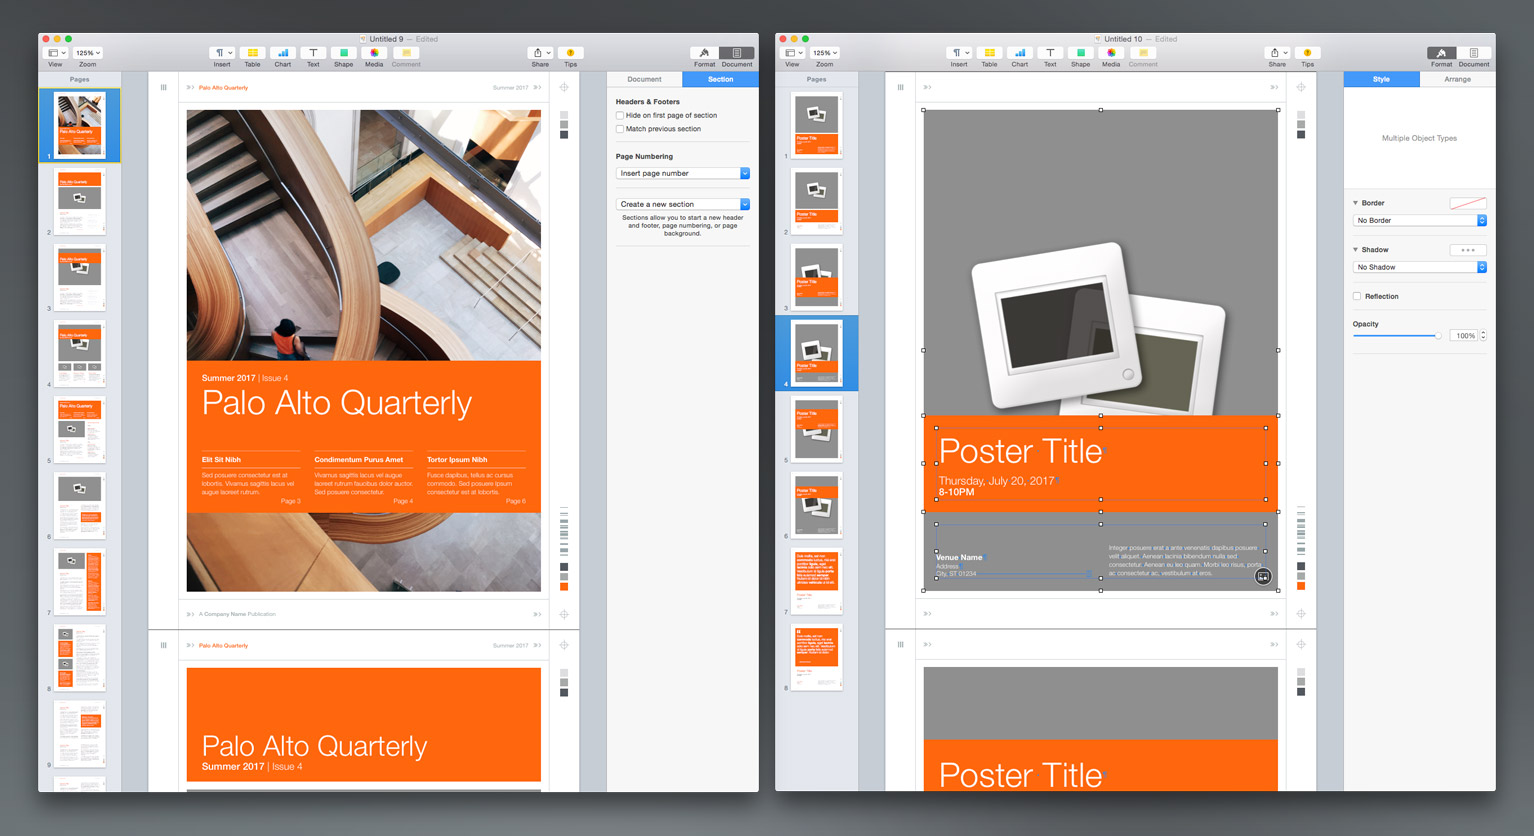
Or we can get a bit more adventurous, and integrate the accent + story leaders from one of the other Newsletter covers to make a more unique hybrid. Scroll to what is now Page 5 in the Newsletter - we're going to shift-select the Title/Issue, story leaders and the locked orange accent box all at once (remember to option-command-L to unlock the accent):
Scroll back up to Page 1, and delete the Title/Issue text object, but leave the orange Accent object - we'll use that for alignment in a moment. Command-V to paste the Title/Issue/Leader construct from the clipboard - since we're in a Layout-mode document, this will paste in exactly as we copied it from the prior page:
With your pasted objects still selected, shift-drag them down until the bottom of the orange accents are aligned on their bottom edges.
Which leaves us with a unique cover option that's not present in either the Newsletter or Poster templates, ready for further customization with a splashy photo and feature-article callouts. Since we're in a Layout-mode document, the entire process is not too dissimilar from what you might expect coming from an older edition of Pages, albeit page-element focused rather than simply copying the page as a discreet object in and of itself.
Next Steps
With the Basics of Page Layout mode covered, we can turn our attention to more complex operations: migrating layouts and elements between Page-Layout and Word-Processing mode documents to create a custom, hybrid-style documents, and how you can capture your own Custom Template from your work:
Mixing it Up: Mixed-Mode Documents in Pages 5/6 - Part 2
This page will be updated as more information is available. Last Updated 11.16.2017
Additional Resources


