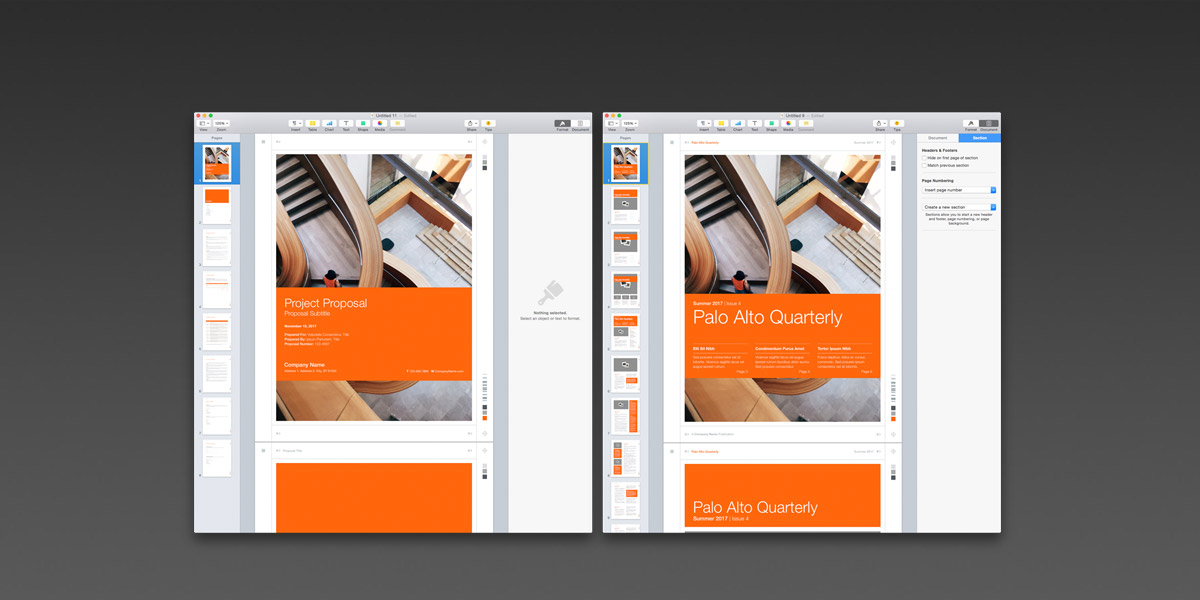
Mixing it Up:
A look at advanced techniques for blending Word-Processing and Page-Layout-mode
document templates into a single, hybrid document style.
Mixed-Mode Documents in Pages 5.x/6.x - Part 2
Updated 11/16/2017
Overview
In Part 1, we looked at The Basics with a run through Page-Layout to Page-Layout migrations and universal concepts. In Part 2, we'll take a deeper look at advanced operations and how we can blend Page-Layout elements into a Word Processing-mode document and how to save a Custom Template to capture your work.
Part 2: Advanced Mixed-Mode Hybrids
This process is a bit more complex when you're mixing elements from a Layout-mode document into a Word Processing-mode document, though - which is also something you couldn't (reliably) do in the old architecture via simple Copy and Paste of a page, since you couldn't mix modes via the clipboard in older versions.
For purposes of this example, let's suppose you're working on a Project Proposal - a Word Processing-mode template - and you'd like to incorporate a Poster-style cover page and the more visual Brochure-style Table of Contents layout, both of which come from Page Layout-mode document templates.
The types of Copy & Paste we've been using thus-far can produce some real oddities in a Word-Processing document, primarily because we haven't had to worry about the running Page Body element that forms the basis of a Word Processing document. Rather than a blank canvas, a Word Processing mode document is threaded - with content from one page automatically spilling on to the next until a Section Break is hit.
So to start, we're going to create new documents from the Project Proposal template and the Small Poster template - and just like last time, we're going to Show Page Thumbnails and Show Invisibles. With a Word Processing mode document, it's also handy to Show Layout (also in the View Menu) to expose the Page body itself.
Also like last time, we're going to select Page 1 of the Project Proposal and Create a New Section after:
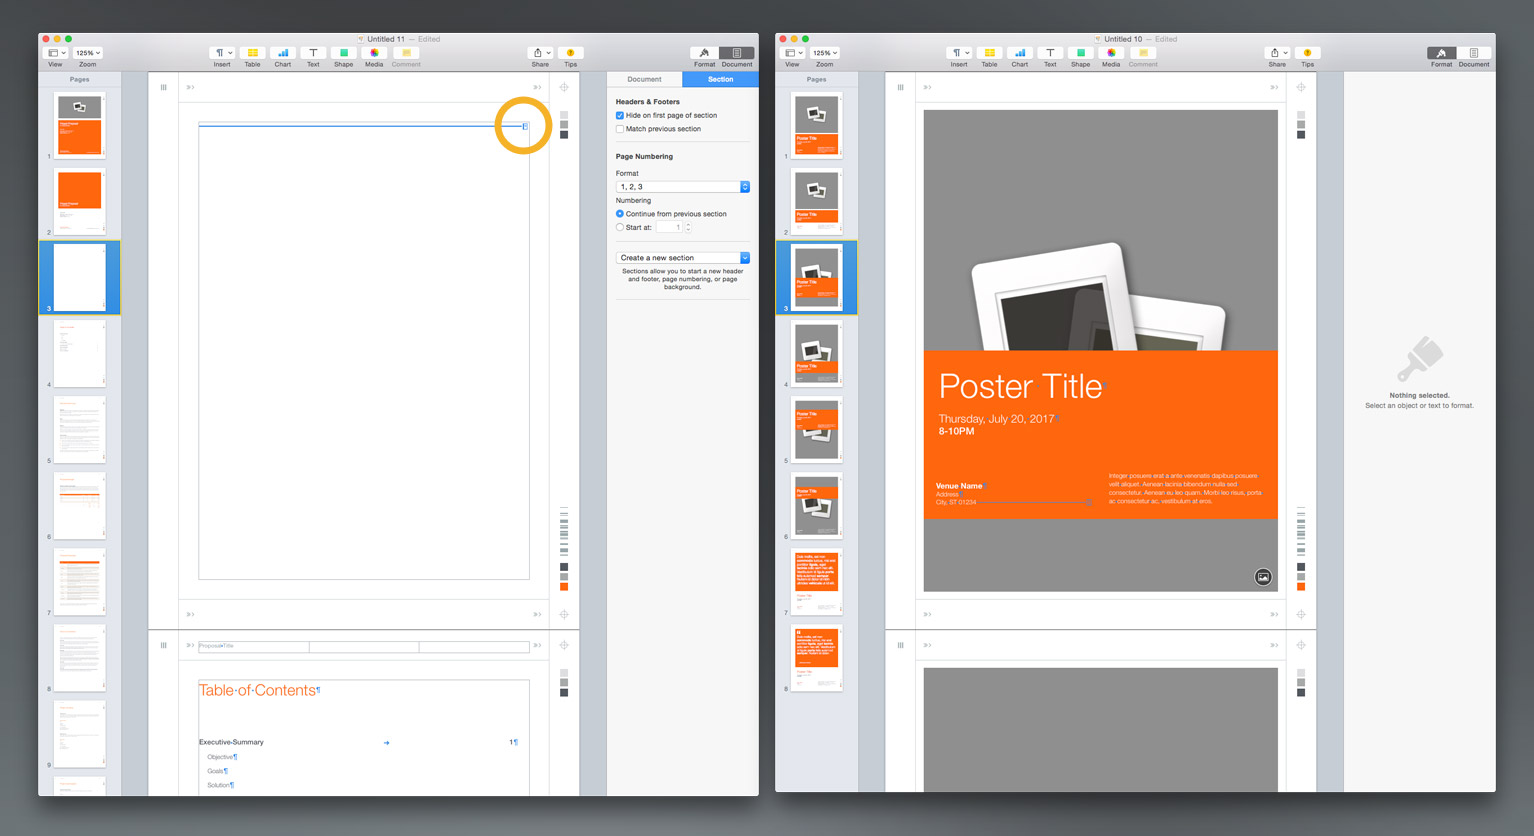
Oddly, this adds a new Blank page to Page 3 instead of Page 2. Did we mention Word Processing mode has its quirks? You'll also notice that rather than being a blank canvas, we have a lone Section Break present on that new page. If you're not seeing the blue Section Break like the image above, be sure View Invisibles is turned on - it's almost essential for this sort of editing.
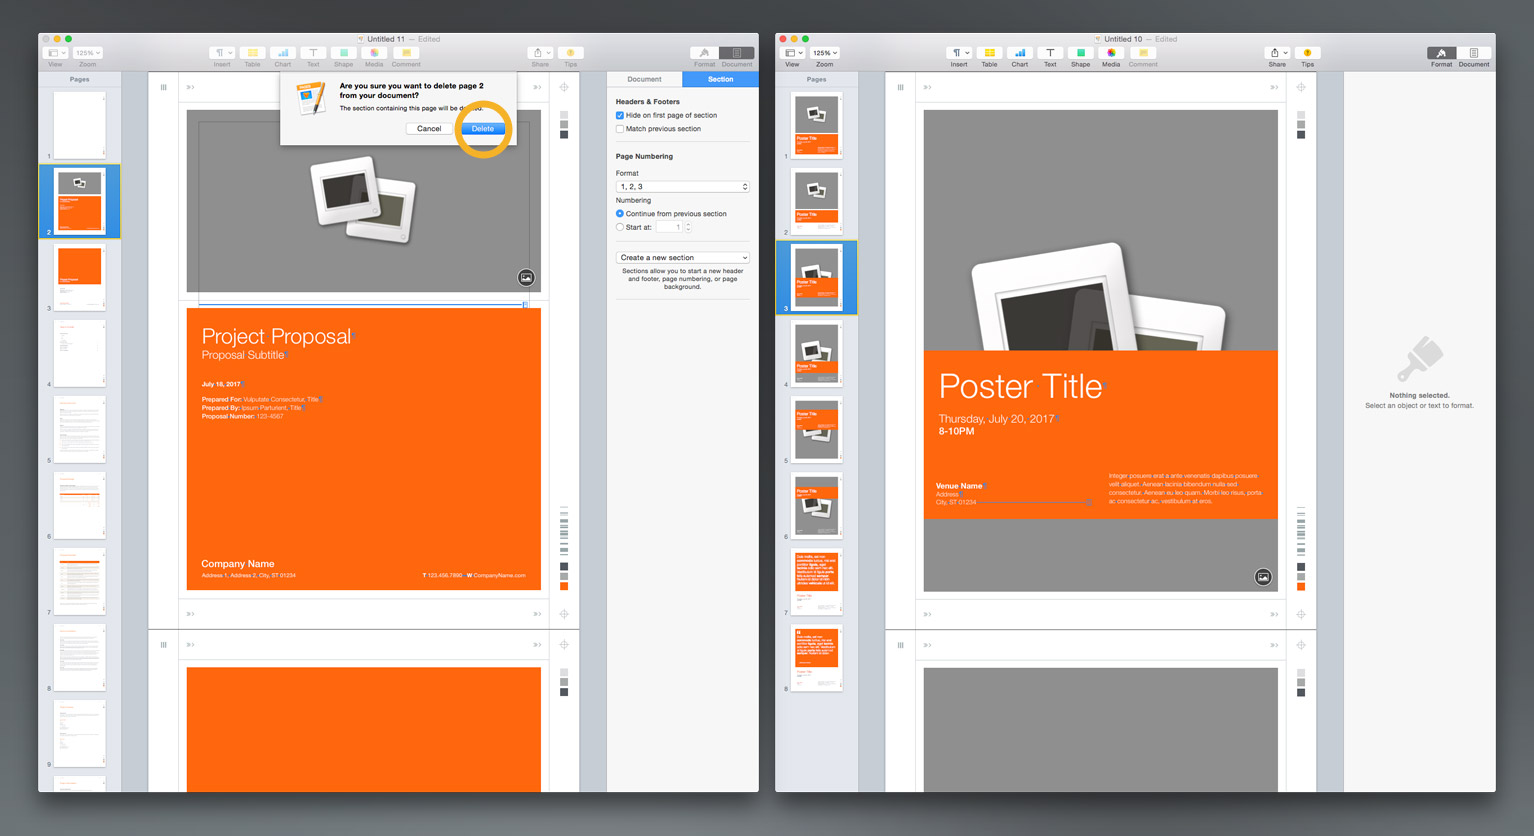
Like last time, let's drag our new Page 3 up to become Page 1. Unlike last time, we're going to get rid of our optional pages before we go much further with this edit - as you'll see, the threaded nature of a Word Processing document can make insertions somewhat unpredictable, so it's usually best to get rid of sections as you move to them to prevent their breaks from impacting the flow of what you're doing. Select Page 2 via the thumbnail, and click Delete - Pages will confirm that you're going to remove the page:
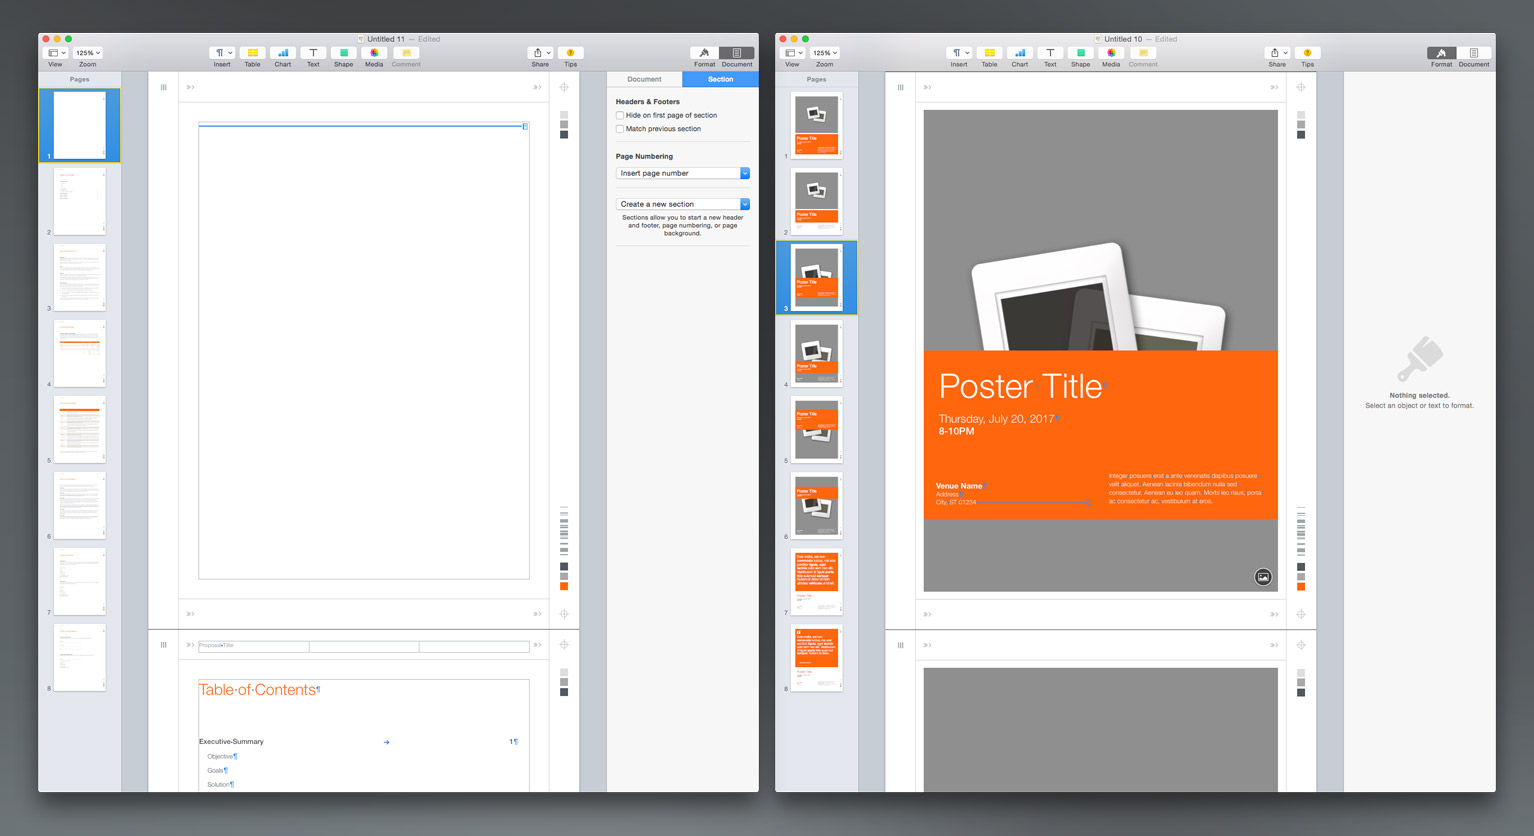
Repeat the process with the Text-Cover that becomes the new Page 2 as well - you should be left with your new Blank page, immediately followed by the template's default Table of Contents:
We're going to use the Page 3 Poster Style this time - in the Poster document, drag-select the elements on the page or shift-select them individually (again - make Master Objects selectable via the Arrange menu if you need to de-select the yellow-handled elements). Unlock the accent as needed, and in this case we're going to de-select the Venue Info text object before we copy the page elements over to our Proposal.
Command-C to copy the Poster elements to the clipboard. In the Project Proposal document, click to the left of the Section Break on the blank page (your selection cursor should be blinking at the left edge of the body, before the line leader and the Section Break icon) and Command-V to paste the poster elements from the clipboard. This will push the section break to a new page following the Title, as shown:
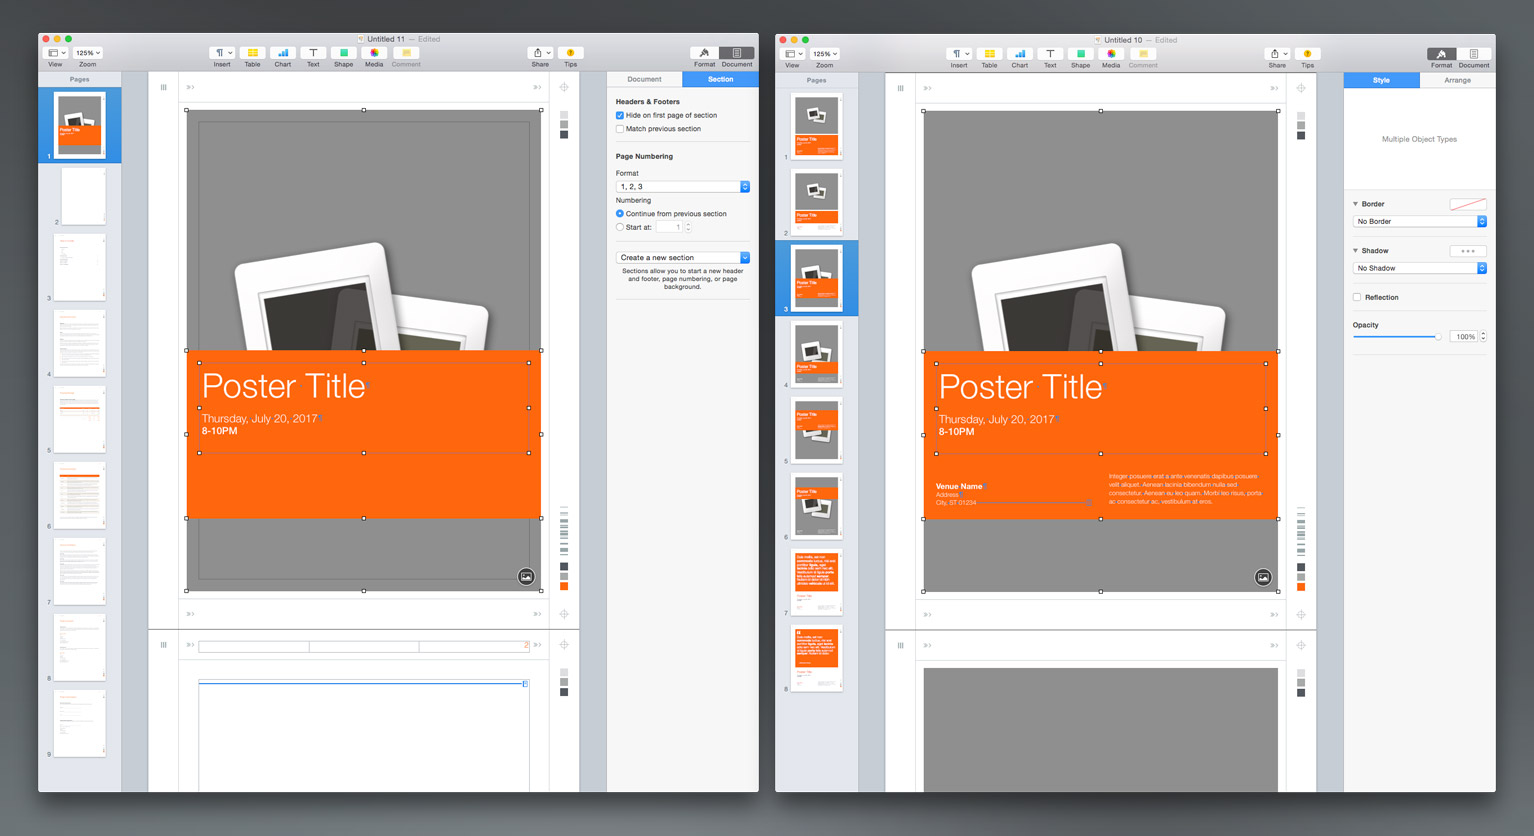
This is happening because the elements you pasted in are causing the body text - in this case the Section Break itself - to wrap to a new page. You'll notice that Page 2 is indented in the Thumbnails, meaning that Page 2 is a child page of the Page 1 section. The Photo is the culprit in this case, as it takes up the entirety of the page body.
Select the photo, and click on Format to expose the format inspector - select Arrange, and underneath Text Wrap select "None" to remove the wrap properties from the photo. The section break should now be visible through the semi-transparent placeholder photo:
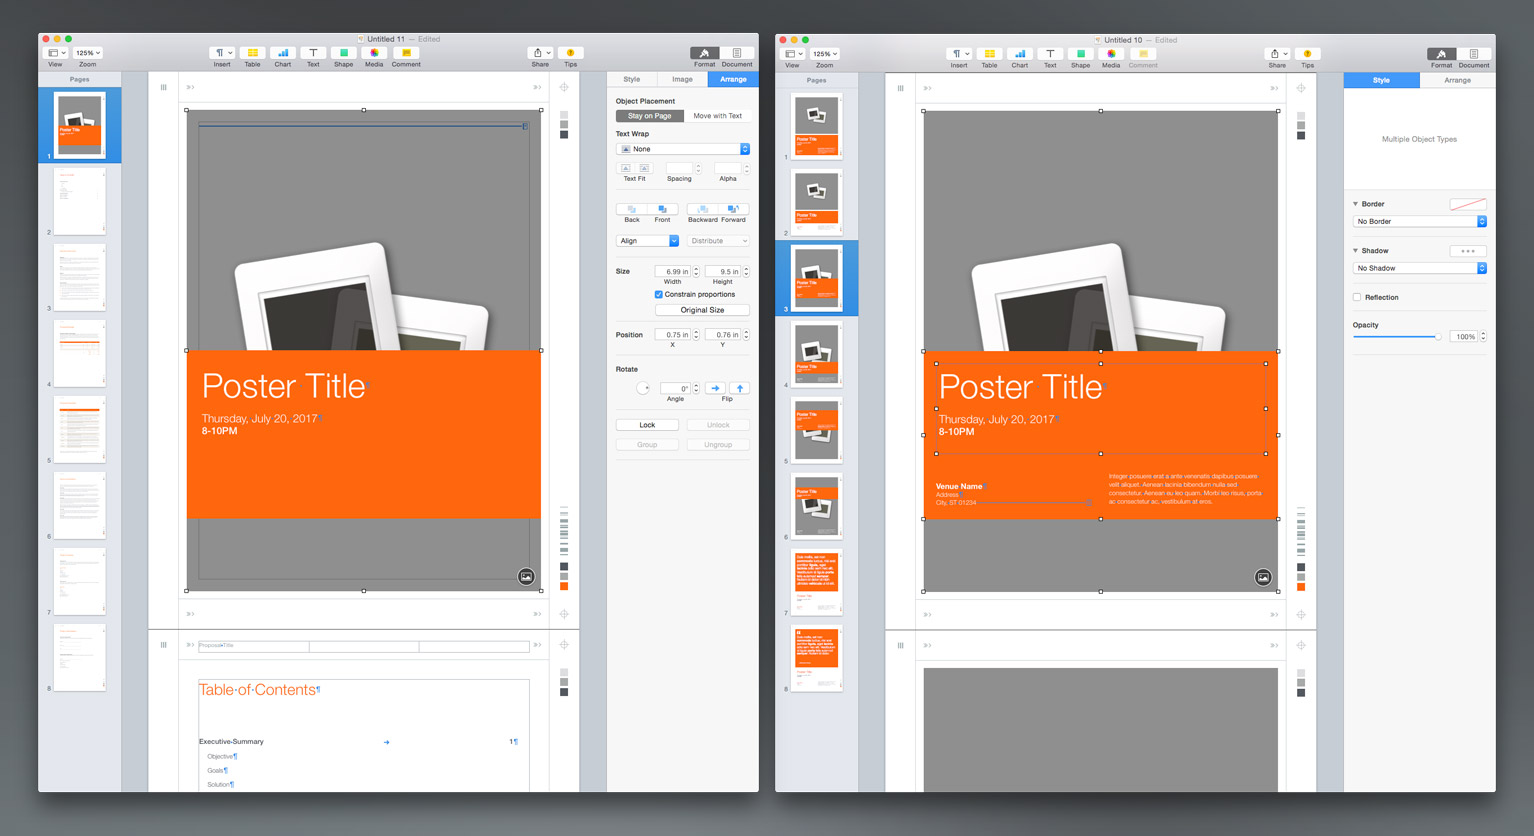
Which will leave you with a revised, Poster-style cover, followed by the default TOC style included with the Proposal template - we'll get to the Table of Content revs in a moment.
We were a little over-zealous in getting rid of the alternate Cover styles as early as we did in this case - we've still got the Poster-style Title/Date combo here instead of the Project Proposal cover text elements. One of the benefits of working from a template is that we can always go back to the beginning in a manner of speaking - let's open a new Project Proposal alongside our revised proposal.
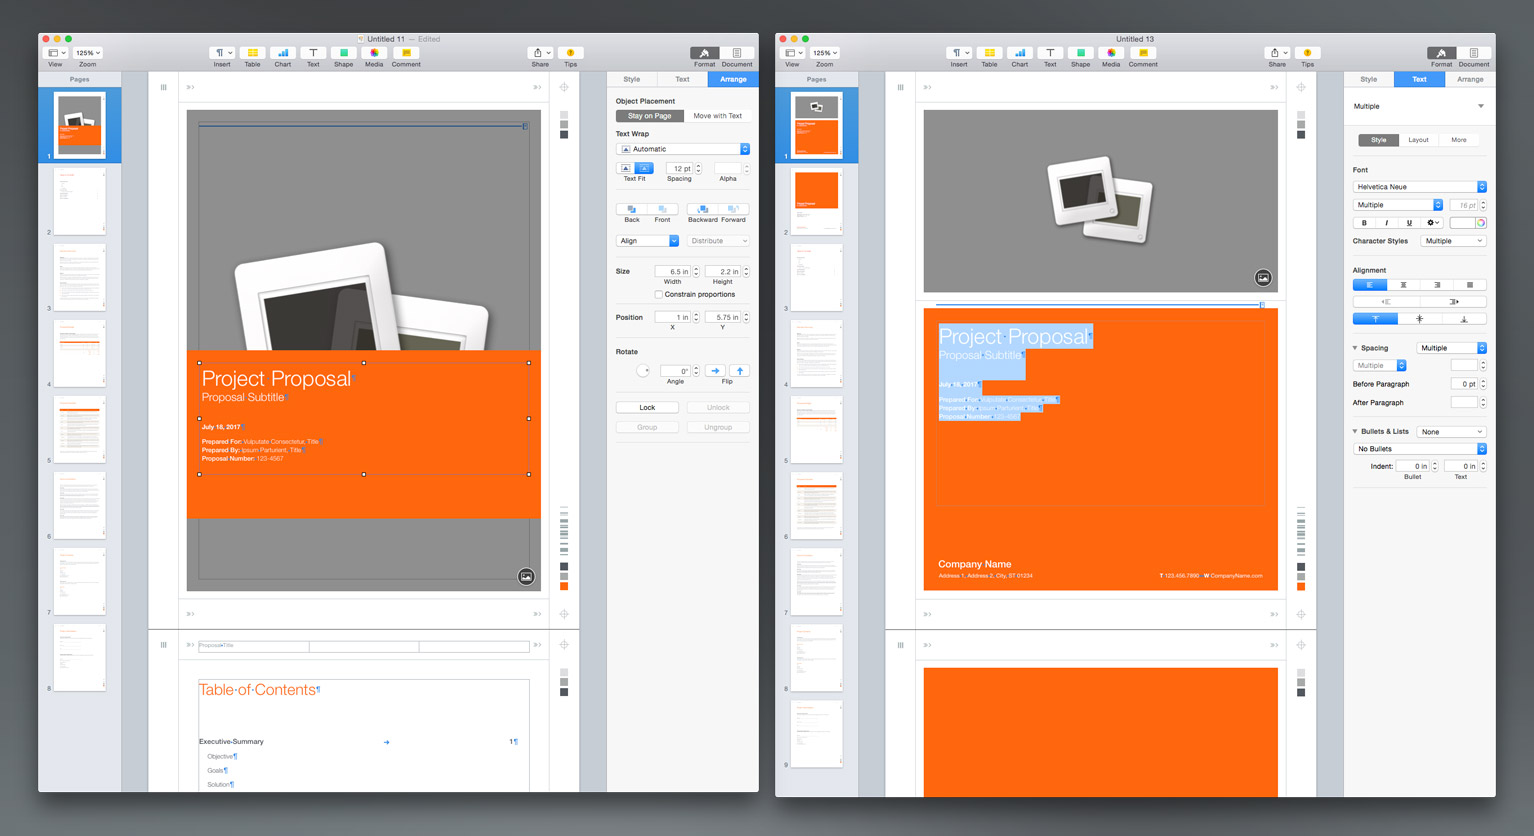
Double-click into the Text Object containing the Title elements in the default Proposal, Command-A to Select All elements in the object, and Command-C to copy those elements to the clipboard. On our new Poster-style cover, double-click into the Text Object containing the Poster Title and Date - Command-A to Select All, and Command-V to paste the title elements from the default proposal. You'll need to enlarge the text object on our new cover to show all of the text - hover your mouse around the Plus at the bottom of the object, and drag down to extend the height of the object.
Likewise, with a Project Proposal we'll definitively want to include our Company and Contact Info - select the 3 elements shown from the default Proposal, copy to the clipboard, and select the Poster-style cover in our new document. They should paste to the same location on your poster-style cover, where they can remain if you'd like that info to appear in front of the photograph - in this case, we're shift-dragging them up onto the Title's accent panel, and snapping alignment to the top of the barcode accent out in the right-hand column:
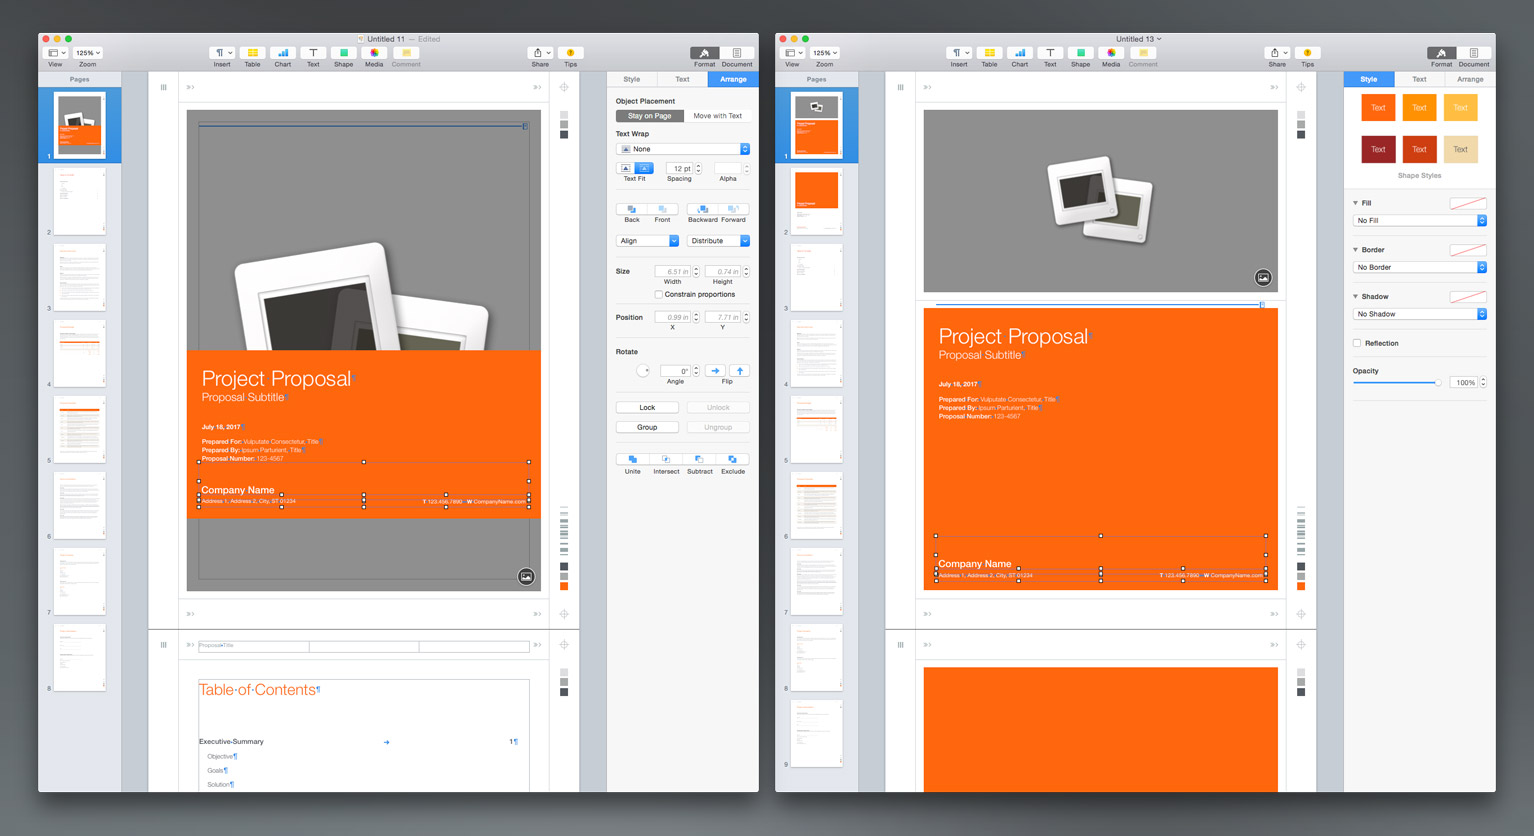
Our custom Cover's ready to go - let's turn our attention to making the Table of Contents pop a bit more. We're going to use the large-title accent style from the Vertical Brochure, so let's start a new Brochure document, and jump to page 4.
We can approach this a couple of different ways: 1) we can copy all of the elements from the Brochure Contents page, including the Table-based Section labels, or we can 2) copy just the visual elements and continue to use the real-time Table of Contents already present in the proposal. For the sake of argument, let's assume the latter - we want the visual pop from the Brochure, but don't necessarily want to edit that table every time there's a change, so the real-time TOC model is a better fit for this document type. If you'd prefer the Table-based model, though, it's easy to do - just copy it over during this next step, and turn off Text-Wrap once it's placed (just as before with the photo) to bring the Section Break back to the TOC page.
In the Brochure, select the Contents title, the orange Accent Box, and the dividing rule - Command C to copy to the clipboard. Back in the Proposal, select page 2 via the Thumbnail, and click into the body, placing your cursor to the left of the Table of Contents Title. Command-V to paste - the brochure elements should paste in as shown, pushing the TOC content down:
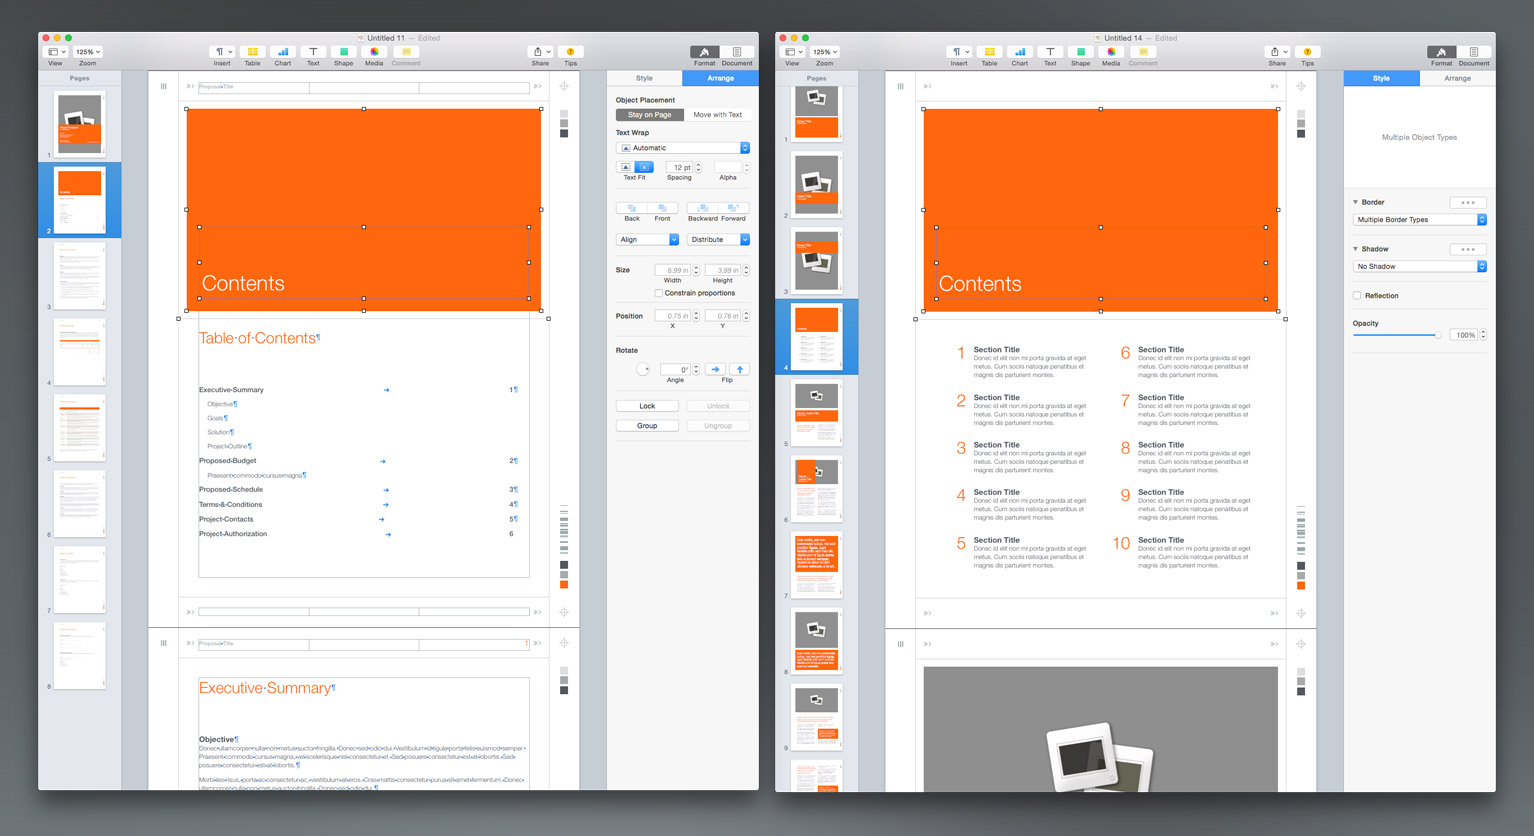
We can certainly get rid of the default Table of Contents title since we've added the more eye-catching accent variation - but in this case rather than deleting it, let's change the style of the paragraph and add a space to keep an insertion point handy - the Table of Contents element can be notoriously difficult to navigate/work around without regular text paragraphs available to provide an insertion point on the page.
Double-click the Table of Contents title in the page body to select the placeholder, and via the Format > Text > Styles panel, change the style to Body. Then type a space to clear the placeholder but leave the paragraph intact - this will give us a running insertion point if we ever need it, and also serves to space the TOC object out a bit from the Accent and Rule elements above. Adjust the Text Wrap spacing on the divider rule, if desired, to control the leading between accent and TOC visually - 9pt is ideal, which can be easier to see if you hide Layout/Invisibles:
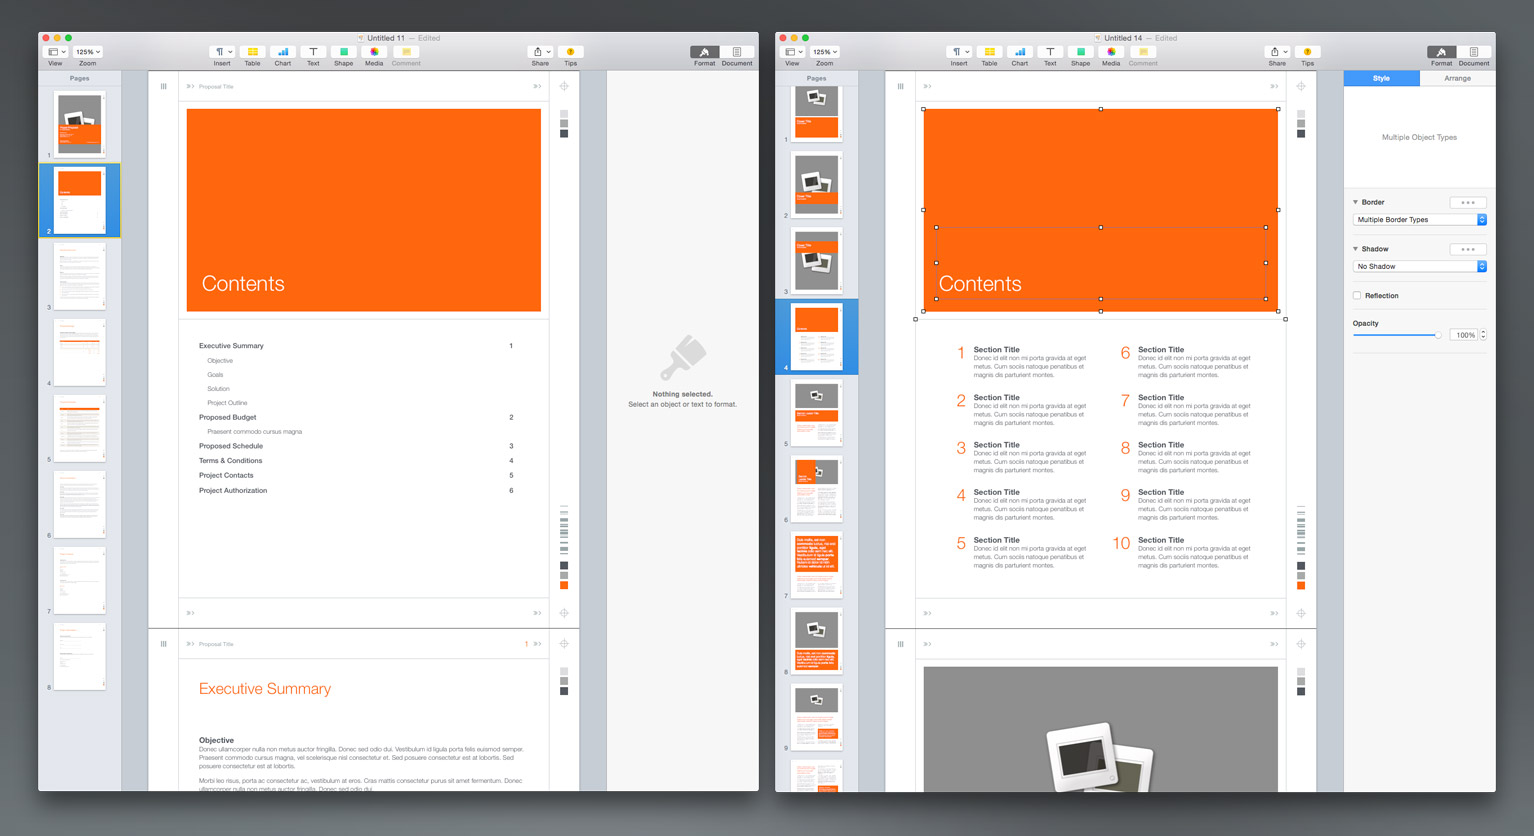
Which hits both of our objectives going into this edit. You can take it further by adding a sidebar from the Newsletter, for example, or other objects from one of the other templates - it's totally up to you. Once you've mastered the techniques down to this point, other types of migrations like these are just variations on the theme - just be mindful of your Section Breaks and Insertion Points in Word Processing-mode documents, it's really quite easy once you get the hang of it.
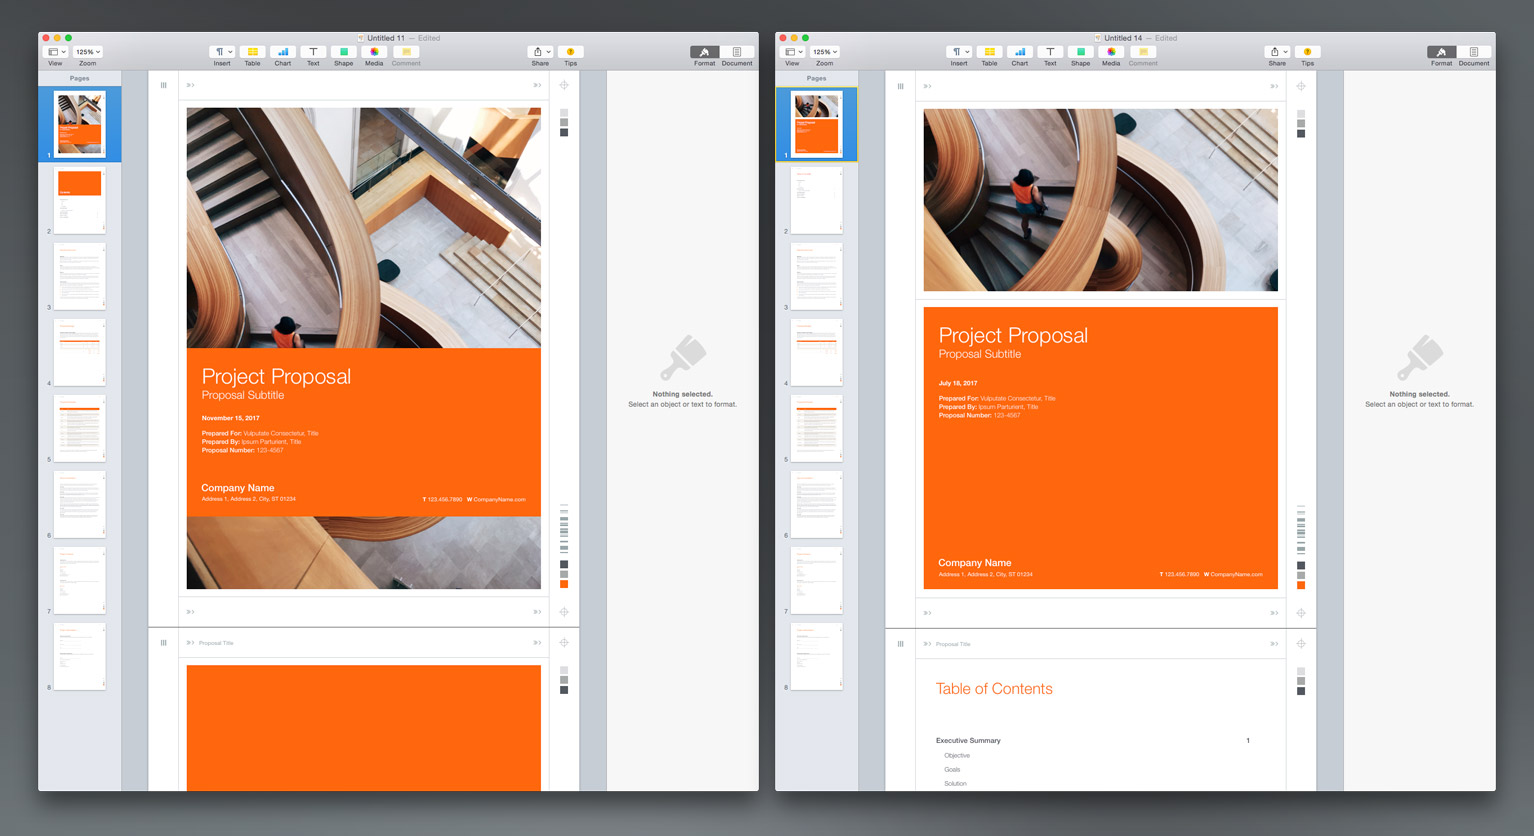
We're left with a unique, custom Project Proposal that has a bit more flair than the pure Word Processing-mode default - just add an eye-catching cover image and you're good to go.
Saving Custom Templates
If you're going to the effort to create something this unique, you'll probably want to use it again and again. At any point, you can save a custom template by selecting Save Template from the file menu. Pages will offer to Save a Copy (best if you're still working out kinks) or to save it to your Template Chooser. Note that Templates include all pages that are present when you save, so we recommend getting it as close to your own functional baseline as possible before committing to Template.
You can remove custom templates you've added to your Template Chooser at any point by right-clicking/control-clicking the template and choosing Delete. Likewise, if you'd like to update a template in your chooser, save it with the same name as the previous version - Pages will prompt you to Replace the prior version of the file as necessary.
This page will be updated as more information is available. Last Updated 11.16.2017
Additional Resources


