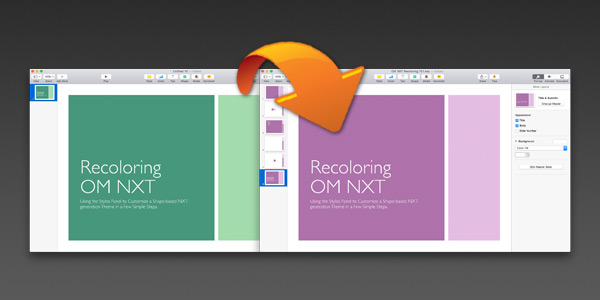
Keynote Basics: Recoloring Shape-Based Keynote Themes in Keynote 6.x - 9.x
Learn to use the Style Palettes to completely transform our shape-based NXT-generation themes for Keynote 6.x - 9.x with your own color palette in a few short steps.
Overview
Thanks to the Style Palettes introduced in Keynote 6, it’s never been easier to transform one of our shape-based themes from it’s stock state to a more unique blend of color, type or effects more suited to your own personal tastes. If you have specific brand guidelines you need to match on a day-to-day basis, for instance, making a theme-wide change to fit specific color or type specifications is a significantly easier process in Keynote 6.x+ than was ever possible in the classic ‘08/'09 architecture.
Several of our NXT-generation themes are great candidates for this treatment, but for this example, we'll be recoloring OM NXT, a print-inspired favorite. If you don’t have OM NXT handy, jump over to our Trial Editions page and download OM NXT LE so you’ll have a theme to follow along with.
**If you're working with one of our older Keynote '08/'09 themes, please refer to our previous Recoloring Themes in Keynote '09 article for a look at how to approach this process in the older architecture.
Set the Stage
Start a new presentation with OM NXT, and add a new Blank slide to your presentation - this will allow you to clearly see the shapes we’ll use to make our changes with.
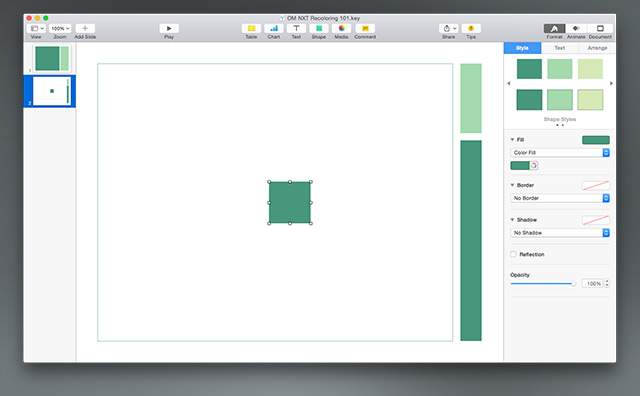
Select Shape from the toolbar - you’ll see a selection of shapes to insert, all color-coordinated to the selected Shape Style. Clicking the Left or Right arrows will scroll through the defined Shape Styles in the current theme - for our purposes here, be sure you’re selecting the first shape style (indicated at the bottom of the panel), and select the Rectangle to insert a new rectangle on the slide. Keynote will insert the new rectangle and select it for you, exposing the Format > Style palette in the process. Your window should now look like the following:
Redefine a Style
You’ll notice the first Shape style in this case is the darker Comfrey Green used throughout the basic OM NXT theme. Each of the Shape Style variations you can choose from when you insert a shape are defined in the Shape Styles section at the top-right of the Format > Style panel, so in this case the Comfrey corresponds to the first Shape Style at the top left of the style selections, the lighter green accent corresponds to the second style in the top middle position (as we’ll see in a moment), and so on.
We’ll start by redefining the Comfrey to another color. With the rectangle you inserted still selected, click on the rainbow color wheel in the Fill section, directly beneath the Shape Styles section on the Format > Style panel: this will open the Color window. Select the second tab in the Colors window to choose Sliders, select RGB sliders, and enter the color you’d like to use: in this case, we’re going to use a subtle purple - 174,114,171. Close the Colors window, and you should be left with your re-colored rectangle still selected on the stage.
Now, we’ll simply redefine the Shape Style we started with to replace the original color with our revised color throughout the theme. Right-click or Control-click on the first Shape Style at the top left of the panel - currently the darker Comfrey green - and select Redefine Style from Selection: you'll get a confirmation dialogue ("54 Objects use this Style"), so just be sure "Update all Objects" is your selection there, and click OK.
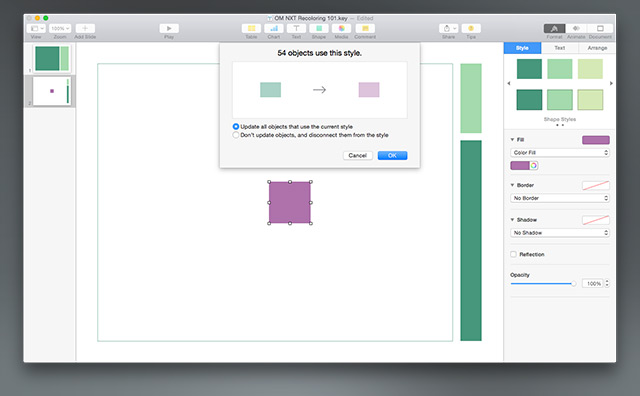
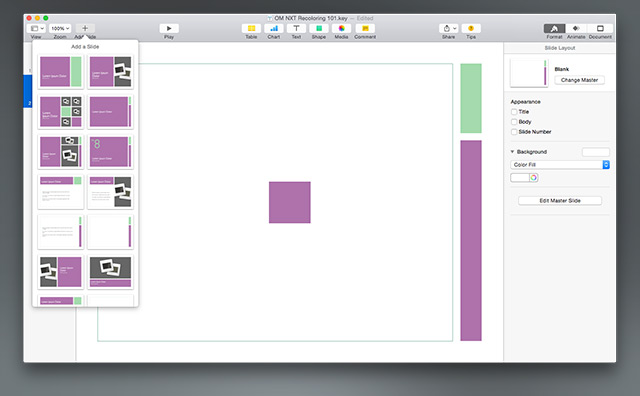
Once you’ve clicked OK, Keynote may take a moment to make the change throughout the file - but once it’s done, you’ll notice this has changed the Comfrey green to our revised purple on the Blank slide we’re working on, as well as the original Title slide above it in the slide navigator. If you click the Add Slide button, you’ll notice it’s changed it for you on all of the presentation’s master slides - you’re well on your way to a custom OM NXT build.
Additional Styles
Next, we’ll redefine the additional Shape Styles that make up the OM NXT layouts. Add another rectangle to the stage, using the Second Shape Style that defines the lighter Accent Green. Change the Color Fill to 228,189,226 to select a pale accent that coordinates with the Purple we’ve already defined, Right-click or Control-Click on the Second Shape Style and once again select Redefine Style from Selection - select Update all Objects and click OK: the primary Accent Color is now redefined throughout your entire presentation.
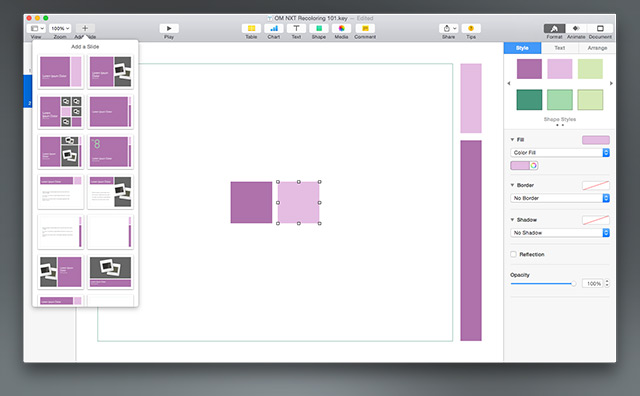
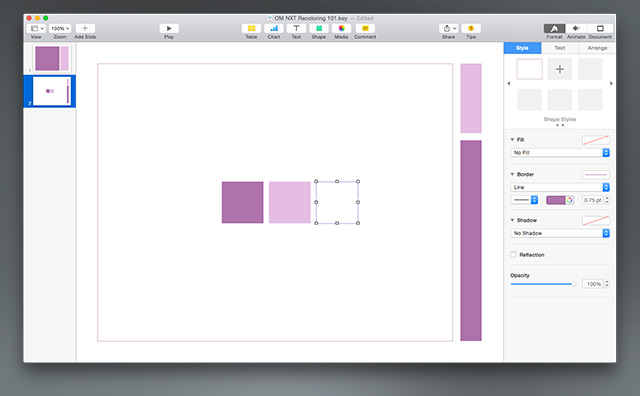
You’ll notice that the stroke outlining the Blank layout still remains green at this point - we have one additional style to redefine to complete our basic changes. Add a third rectangle to the slide, and click the Right arrow in the Shape Styles panel to move to the second panel of selections - the Outline style is tucked away as a seventh Shape Style in the OM NXT theme. With the third rectangle selected, click on the outline style to apply it to the rectangle - you’ll notice the Fill setting changes to No Fill, while the Border changes to a green Line style. Click the rainbow icon to bring up the Color window, and change this color to our original purple - 174,114,171. As before, Right-click or Control-click the Outline shape style you applied and select Redefine Style from Selection, selecting Update all Objects and OK.
At this point, you’ve successfully redefined the basic shape styles that make up the OM NXT slides. There are a few additional text styles we’ll want to adjust to be sure everything’s synced throughout the deck, but you’ve already got the basics of the process if you’ve been following along to here.
Updating Text Styles
If you click Add Slide at this point, the pale green “No. 8” on the Numbered Section Title & Subtitle master stands out right away - there are a few Text Styles we’ll want to update as well. Add the Numbered Section Title & Subtitle slide to your presentation to make it easier to access the applied styles. (**This Slide Master is not included in the free OM NXT Limited Edition download - you can redefine the underlying styles if desired by using the Text Object method mentioned further below, or skip it entirely)
Select the 8, and on the Format Panel change to the Text panel: Numero Digit should be displayed at the top of the panel as the applied style. Click the rainbow icon under font to open the Color window again, and set the color to our revised Accent: 228,189,226. A blue Update button should appear next to the style preview at the top of the panel:
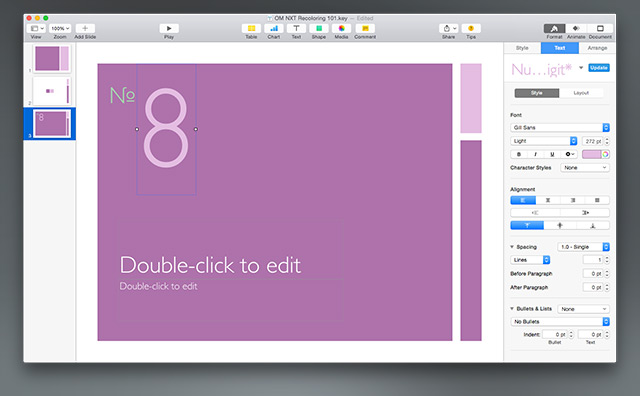
Click Update to redefine the style in the underlying Style Sheet, just as we did with the shapes before - the update button will disappear once it’s complete.
The Numero glyph isn’t editable on slide level, but if you double-click it Keynote will offer to open the underlying Master Slide, where you’ll be able to select it directly - click Edit Master Slide when prompted. As before, change the font color to our revised accent - 228,189,226 - and click Update. Click Done at the bottom of the slide window to close the Master Slide and return to your presentation.
There are a few additional styles we’ll want to redefine for completeness sake - we can manage these through the Style selector directly.
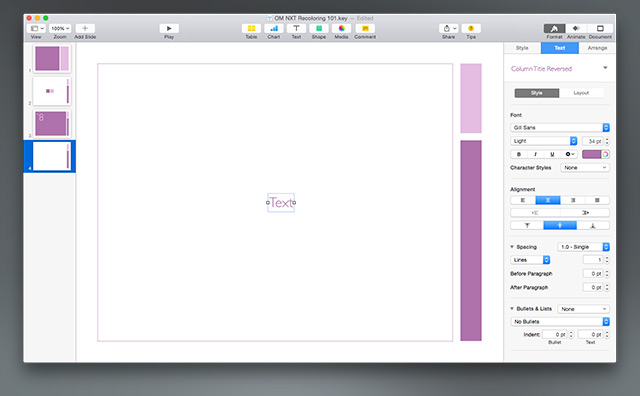
Add another Blank slide to your presentation, and click the Text button to add a new text object to the slide: you’ll notice this defaults to the Caption style, which is a slightly darker version of the original Comfrey green. On Format > Text, click the rainbow icon to bring up the Color window, and change this color to 122,81,120, which is a 20% darker version of our revised Purple. Click Update to redefine the Caption style.
With the text object still selected, click the triangle to the right of Caption style preview in the Text panel to expose the additional styles included in the theme: a few more green text styles should stand out, notably Title Reversed and Column Title Reversed, among a few others. Select Title Reversed to apply the style to the selected text object. Change the color to our revised purple - 174,114,171 - and click Update. Apply the next style, and repeat the process until you’ve updated all of the green styles to purple.
The Extra Mile (Optional)
If you’ve followed along to this point, you’ve already mastered the basic process - all that remains is rounding out the other miscellaneous definitions included with a theme to complete the transformation.
If you insert another Blank slide and another rectangle, you’ll notice that we still have some green remaining in the Shape Styles panel. These are redefined exactly the same way as the initial shapes, and will round out the Shape Styles you’re offered when you insert a shape. But if you click on Shape, you’ll also notice that the Lines at the top of the panel are still green.
Line Styles are separate from the Closed Shape Styles in Keynote - the panel that appears when you click Shape pulls Line Style 1 and Shape Style 1 together into a single selector panel, but they’re defined separately. To get them coordinated, add a line to the slide - you’ll notice the Line Styles appear in place of the Shape Styles in the Format > Style panel - update the stroke color of the line, and Redefine Style from selection, just as you did with the Shapes earlier. Repeat as needed to fully coordinate your Line and Shape styles.
Getting Table and Chart definitions right can be rather involved, and is a bit beyond the scope of this tutorial - if you’re using tables or charts in your custom version, you can read more about Table and Chart Styles at Apple’s Keynote User’s Guide site.
Save Your Theme
Once you’ve converted OM NXT to your custom palette, you can save your own version of the theme to use again and again.
Remove the additional slides you added during this tutorial, so that you’re left with just a Title slide. From the File menu, select Save Theme and Add to Theme Chooser to make your new theme appear in the My Themes section of the theme chooser, ready to start your next presentation with (if you ever need to remove it, Right-click or Control-click the theme in My Themes and select Delete).
Additonal Resources.


