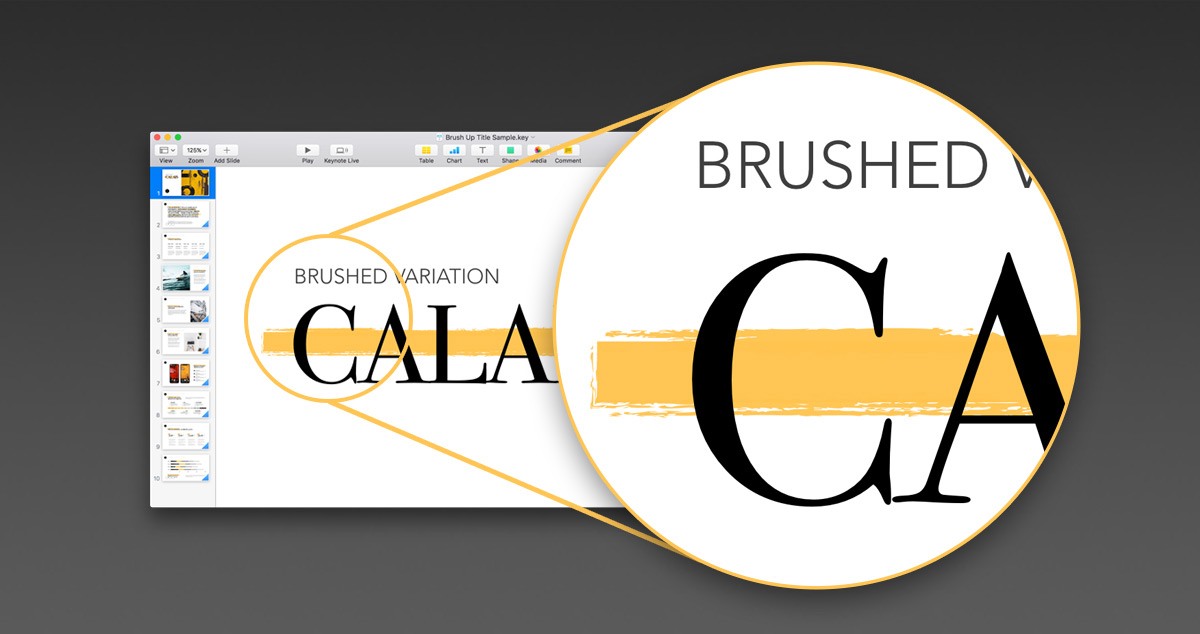
Calais Brush-Up:
Use a simple Shape Style override to instantly bring an organic,
brush-stoke feel to your Calais presentations.
Quick Tip: Redefine a single Shape Style to transform Calais into an organic, Brushed variation.
Updated 3/14/2018
Overview
In some of our previous tutorials, we've taken a look at how easy it is to affect theme-wide changes in our NXT-Generation themes through simple shape-style changes. If this is your first time delving into this sort of customization, you can find a bit of additional background in the Palo Alto: Instant Classic Tip or the more in-depth Recoloring NXT-Generation Keynote Themes Tutorial, but they're not required reading for this example.
Our recent Calais theme offers an excellent insight, though, into just how much can be packed into these style definitions. We've covered the color-change side of things a few times already - so we're not going to re-tread that here. But Keynote's Style Definitions don't stop at the color of the fill: they can also include stroke or effect information as well.
We can leverage that in Calais to apply one of the organic, brushed Line Styles to the Title Accent object & give it more of a hand-made feel throughout your entire presentation in just a couple of steps. These brushed shape styles are already defined for you in the Calais Supplemental file, but they're easy to set up if you want to follow along in the steps below.
The Steps
There are only a few steps involved in transforming the basic Calais look into a Brushed variation. Start a new presentation using Calais, add a few slides you can use to reference your changes, and add a Square shape to the stage to get started:
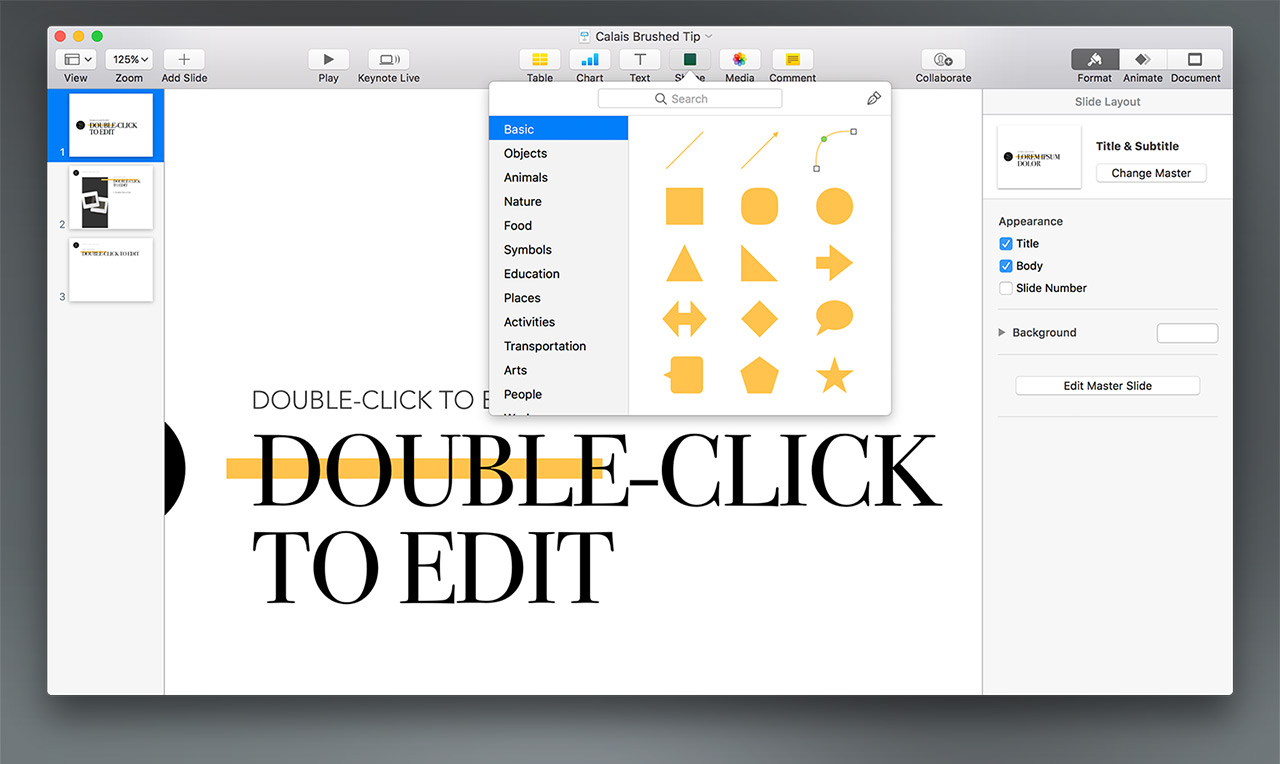
This shape will act as our proxy for the style we're going to redefine. With this new square selected, look to the Format > Style menu, and click over to the second panel of Shape Styles - this is where our Framework-Reserved styles are defined. Click the signature Yellow to apply this style:
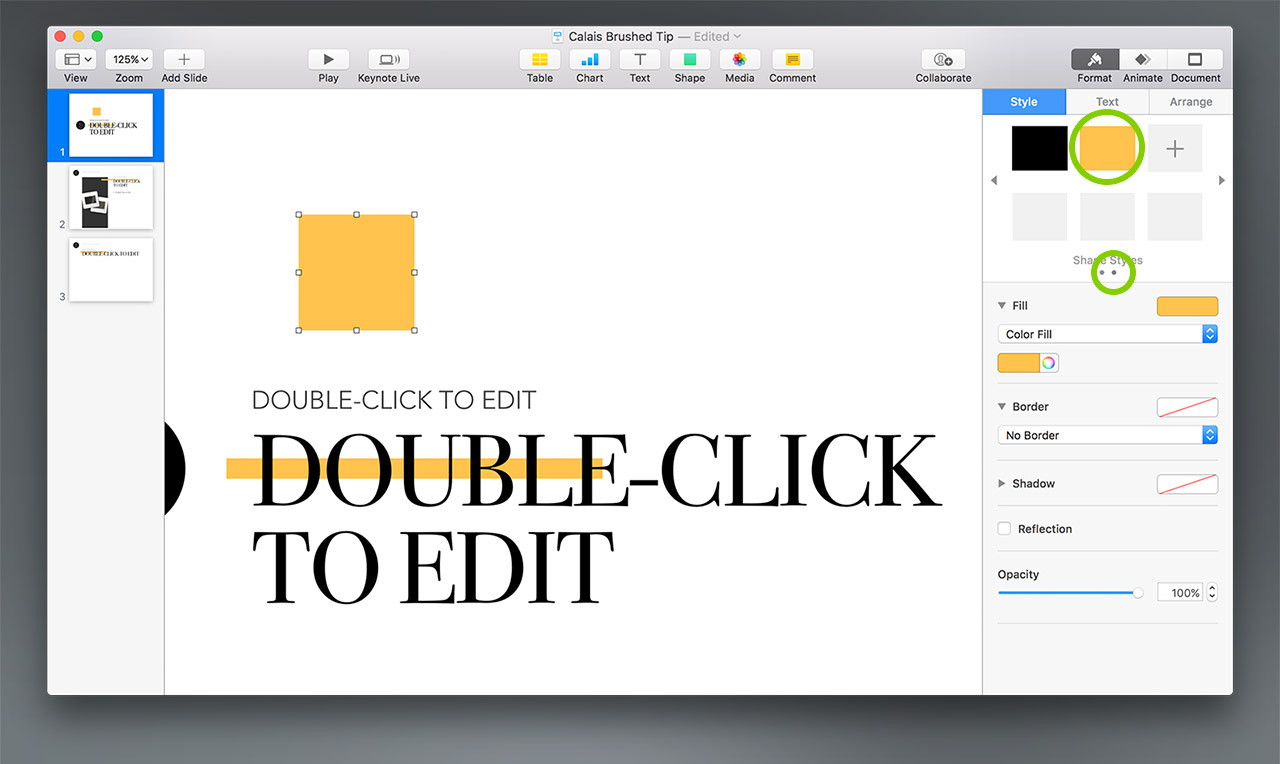
That syncs us up with the currently-applied style. Next, we'll add a Stroke to work with - expand the Border section as needed to expose the settings. Click the Line style selector, and select the Brushed style, second-from-bottom:
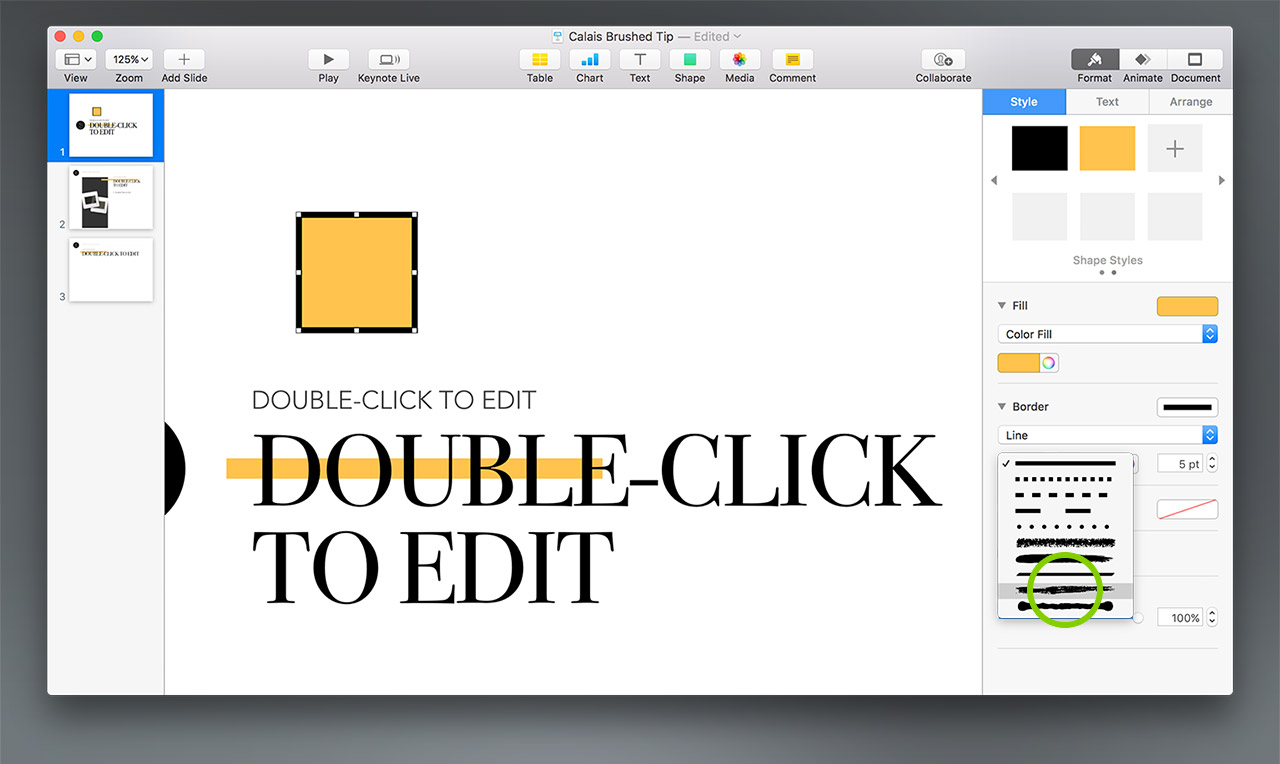
Run the Line weight up to 16pt, and color-match the shape fill - on a Mac, you can do this by clicking and holding the fill color and dragging to the line color, replacing the black. Alternately, you can use the eyedropper to sample the correct color. You should end up with the following:
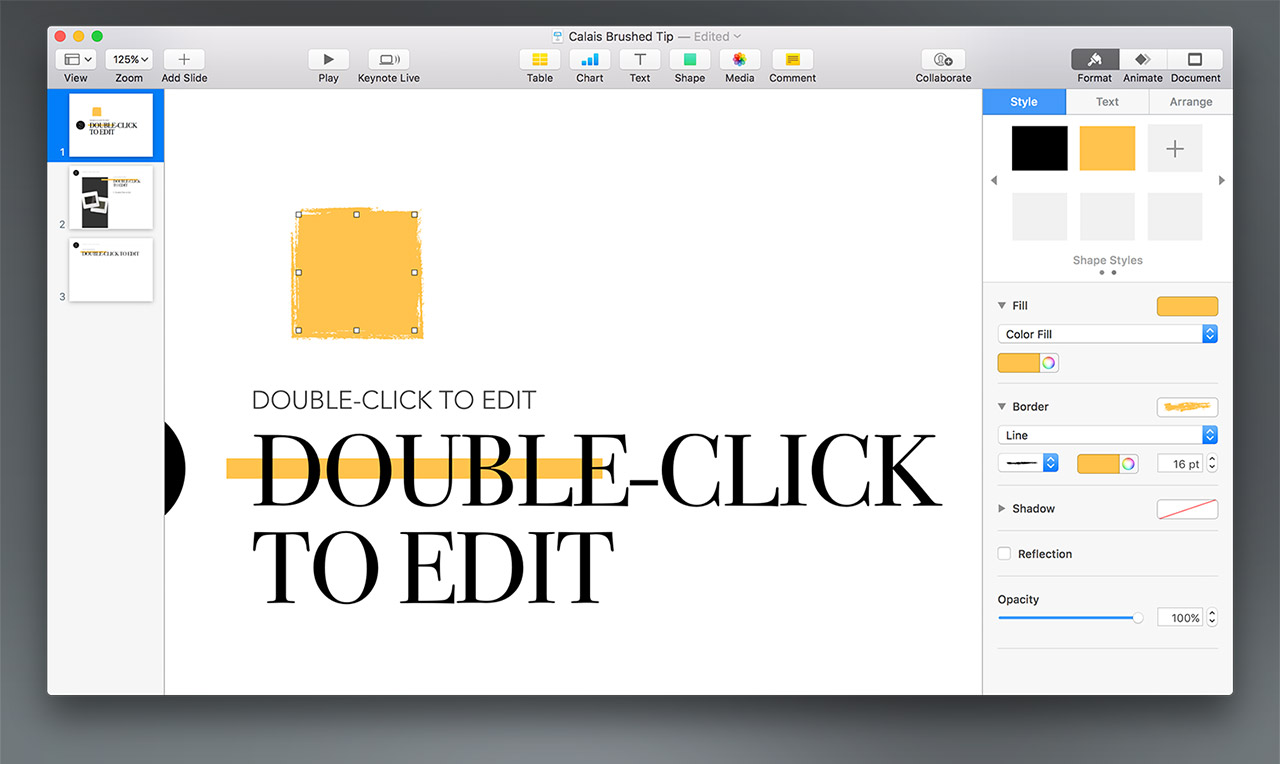
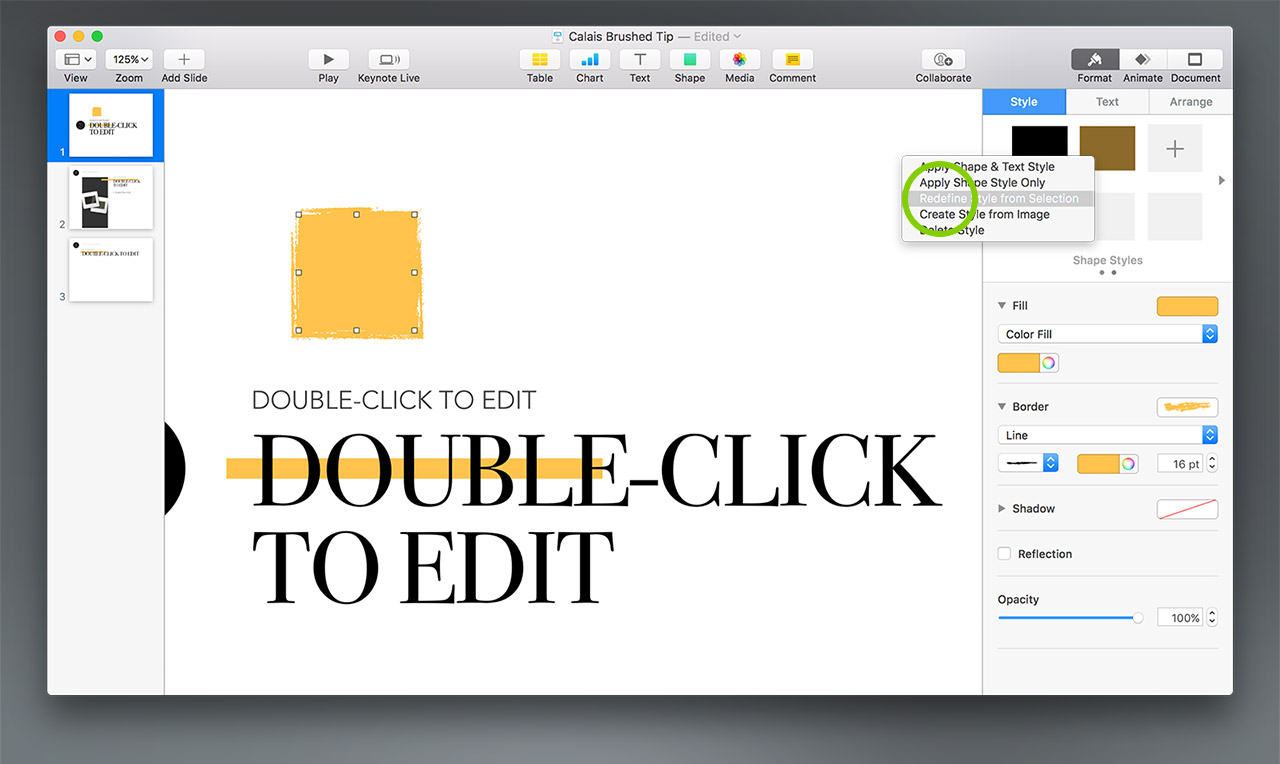
With the shape selected, Right or Control-Click on the style definition we'd applied earlier, and select Redefine Style from Selection:
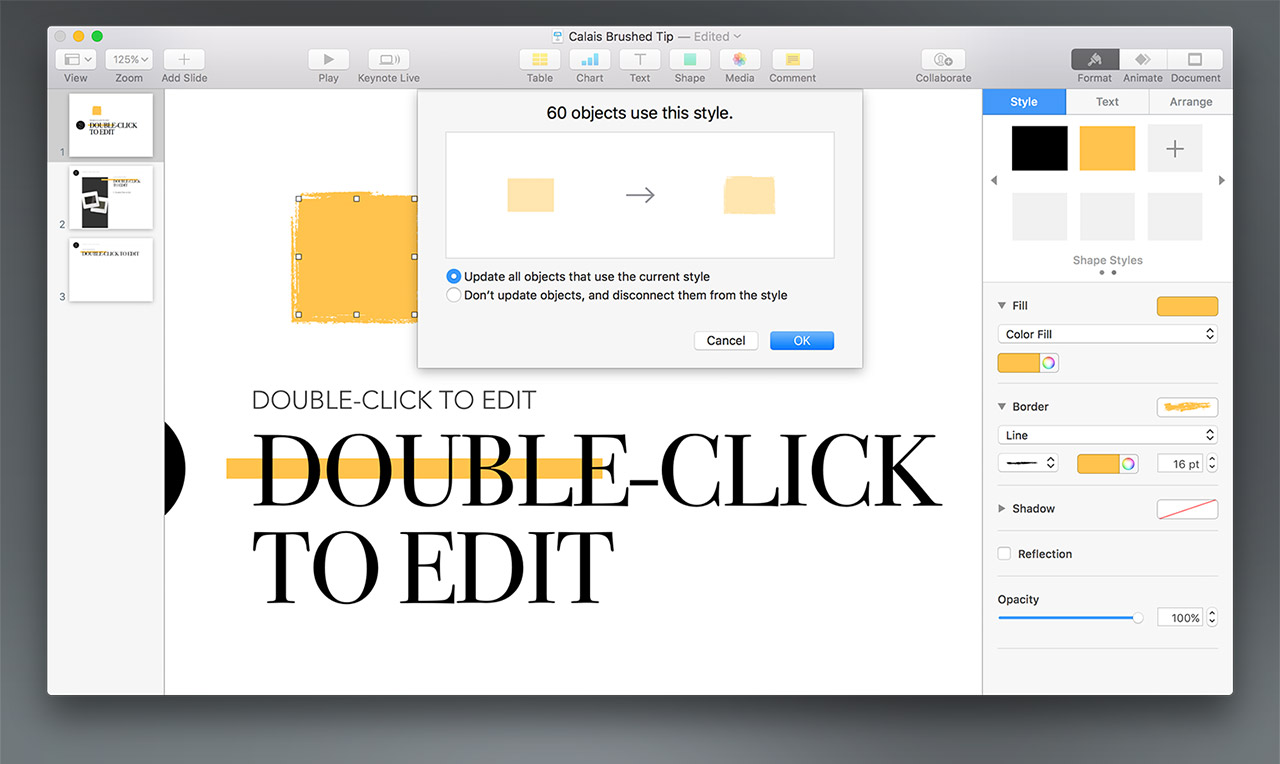
Keynote will verify that you want to redefine every shape in the presentation using that style - be sure Update All Objects is ticked before pressing OK:
And you're done! You should see the change happen instantly on any slides you've already added:
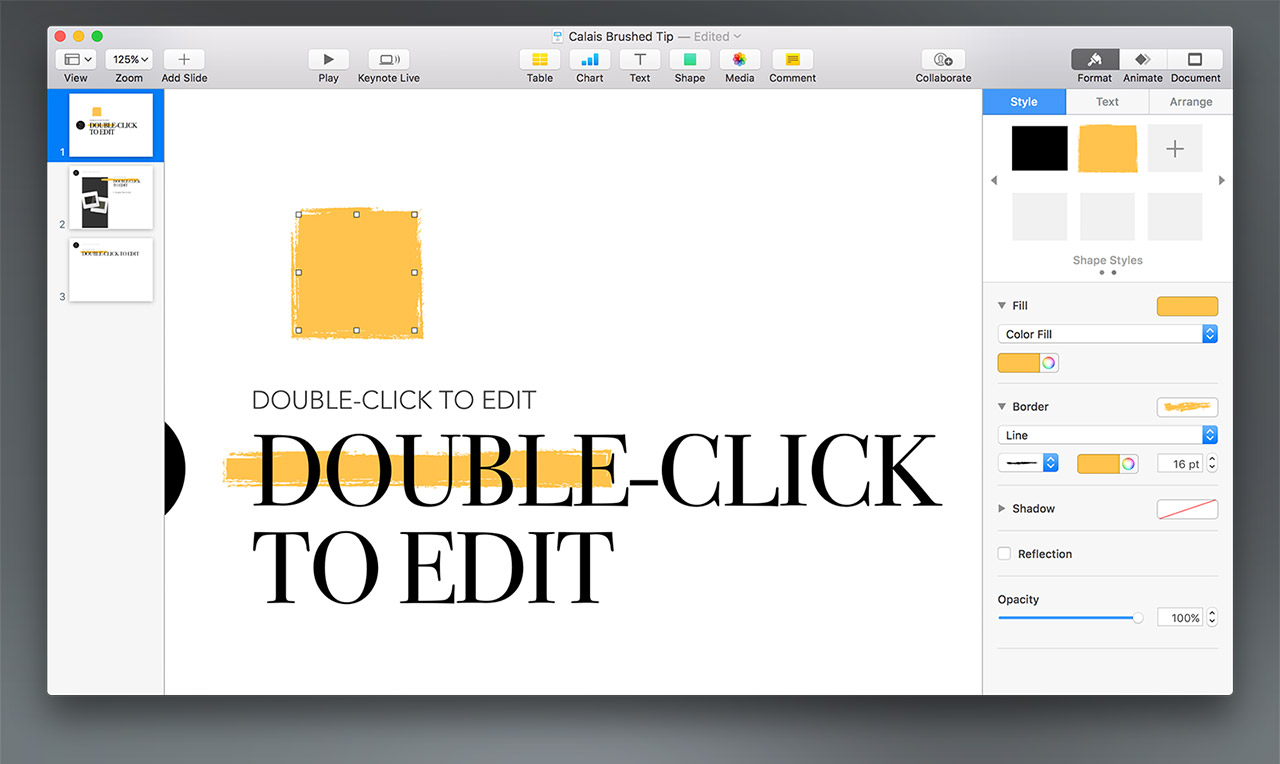
And if you add a new slide, you'll see that it's made the change on all of the underlying master slides throughout the presentation as well:
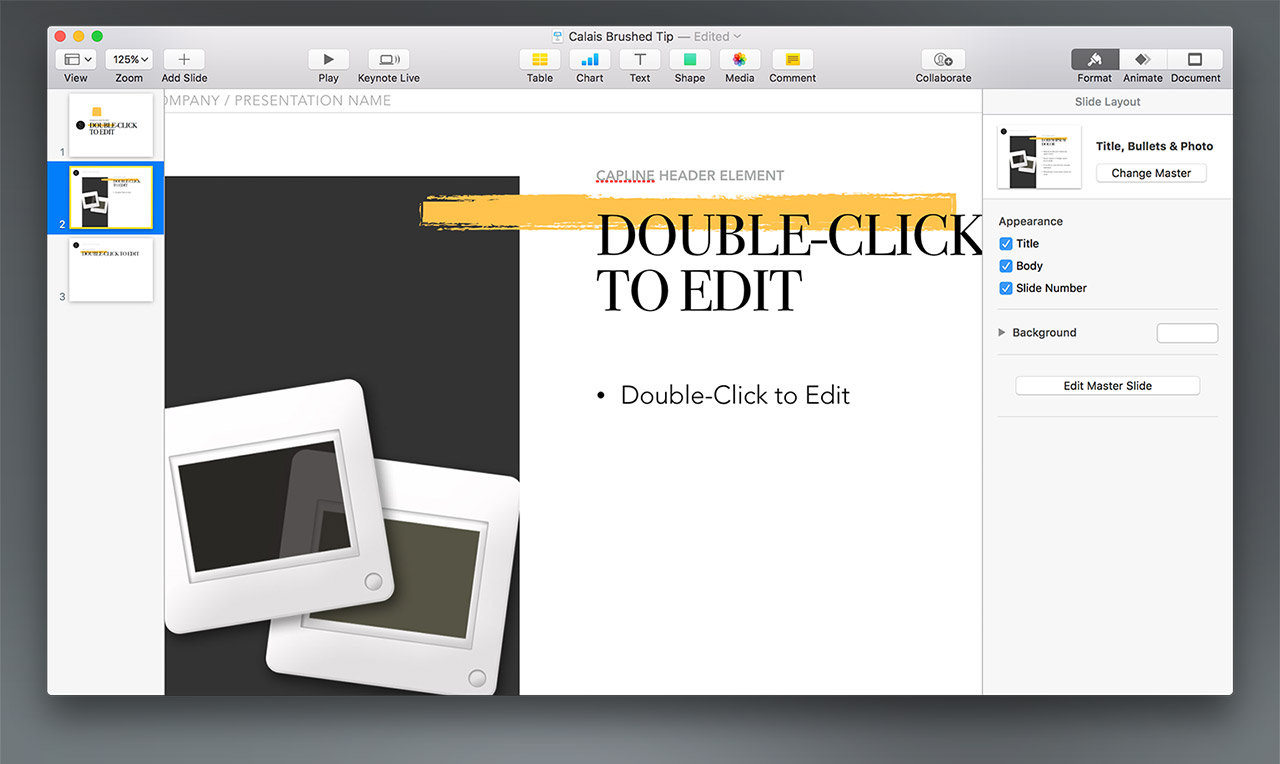
That's all there is to it - it's a very limited form of the whole-theme change we outline in our NXT Re-coloring Tutorial. You can save a custom version of Calais Brushed from your file if you'll be using this trick frequently: From the File menu, select Save Theme and Add to Theme Chooser to make your new theme appear in the My Themes section of the theme chooser, ready to start your next presentation with (if you ever need to remove it, Right-click or Control-click the theme in My Themes and select Delete).


